Welcome to the New at SU March Blog Hop as we CASE the 2021-2022 Annual Catalog using products from the January-June 2022 Mini Catalog. What is CASE? It stands for Copy And Share Everything and is simply a way to help spark your creativity by using a project to help provide you with a map to create your own beautiful creations. Whether you choose to copy the design exactly or use the layout, the colors, the stamp set or any combination, it is a great starting point to help you get creative.
For my card design, I chose to CASE the above card design from the 2021-2022 Annual Catalog, which can be found on page 51. This card design uses the Layering Diorama Dies with the Sailing Home stamp set and coordinating Smooth Sailing Dies. For my card, I have chosen to use products from the New Horizons Suite from the January-June 2022 Mini Catalog with the Layering Diorama Dies. For my card design, I decided to switch it from portrait to landscape and instead of an ocean theme, I chose to showcase the mountains. For the background, I used one of the woodgrain designs from the Heart & Home Designer Series Paper. The Layering Diorama Dies worked perfectly for the opening and I created two layers using the 3rd and 4th largest dies. I love the texture and layers of this design and I think it would work well for a variety of occasions. Products Used:
On the Horizon Bundle (item #157779)
New Horizons 6"x6" Designer Series Paper (item #157768)
Pebbles Enamel Shapes (item #158141
Layering Diorama Dies (item #155565)
Tailored Tag Punch (item #145667)
Heart & Home Designer Series Paper (item #157928)
Basic Gray Cardstock (item #121044)
Misty Moonlight Cardstock (item #153081)
Rich Razzleberry Cardstock (item #115316)
Garden Green Cardstock (item #102584)
Pear Pizzazz Cardstock (item #131201)
Basic White Cardstock (item #159276)
Misty Moonlight Classic Ink Pad (item #153118)
Versamark Pad (item #102283)
Metallics Embossing Powders (item #155555)
Stampin' Dimensionals (item #104430)
Mini Stampin' Dimensionals (item #144108)
Measurements:
Basic Gray Cardstock
Card Base - 8 1/2" x 5 1/2" (Scored at 4 1/4")
Rich Razzleberry Cardstock
Layer 1 - 5 1/4" x 4"
Heart & Home Designer Series Paper
Card Front - 5 1/8" x 3 7/8"
New Horizons Designer Series Paper
Background Layer - 3 3/4" x 4 3/4"
Misty Moonlight Cardstock
2 sets of mountains die cut with the Horizon Dies
Basic White Cardstock
1 set of mountain detail (Snow) die cut with the Horizon Dies
Sentiment Tag punched with the Tailored Tag Punch
Garden Green Cardstock
1 set of grass die cut with the Horizons Dies
Pear Pizzazz Cardstock
2 sets of grass die cut with the Horizons Dies


Thank you for taking the time to visit my blog. I hope that my card design will help inspire you to try CASEing to create your own beautiful card designs. Whether you decide to copy the design exactly or use it as a blue print for your own wonderful design, it is a great way to open new doors to your creativity.
Now it's time to visit Rochelle's wonderful blog and see what she has chosen to CASE for this month's blog hop. Just click on the Next button to visit her blog or use the Roll Call List to find your way. We would appreciate it if you would leave us a comment and let us know what you liked about our projects. I hope you enjoy the rest of our blog hop.
Roll
Call List
If you live in
the U.S. and do not have a Stampin' Up! Demonstrator, please contact me and I
would be happy to help you with your creative projects. You may also visit my
Online Store to place your order and have it shipped to you.
Until Next
Time
Happy
Stamping,
Tricia Butts
Independent Stampin' Up!
Demonstrator
Like What You
See? Visit My Online Store Here
Visit My Facebook Business Page for Updates & Ideas
Click here to Contact Me
Save 20% With The Savings Are In Bloom Promotion
During The Month Of March
Click Below To Visit My Online Store
Available For A Limited Time
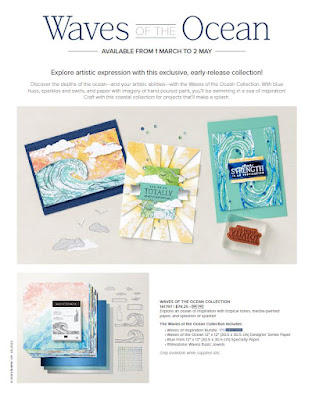
The Amazing Waves Of The Ocean Collection
Click Below For More Details


Great use of the CASE layout!
ReplyDeleteThank you Ginger. It was a fun card to design.
DeleteTricia, you turned this card on it's head to make a clever "CASE" of the idea!
ReplyDeleteThank you Loni. I love how it looked as a horizontal design with the mountains.
Deletei love your card, great CASE
ReplyDeleteThank you Anke. I love CASEing from the catalog.
DeleteThis is a great use of the Horizon dies and the On the Horizon DSP! I love it!
ReplyDeleteThank you Heather. This is a wonderful suite of products and worked perfectly for this CASE.
DeleteWow, this is so so pretty!
ReplyDeleteThank you Annette. I loved creating this mountain scene.
DeleteGreat masculine card Tricia
ReplyDeleteThank you Rochelle. I loved creating this beautiful scene.
DeleteLove the way you used the DSP for the background.It's so soft and muted.
ReplyDelete