
Welcome to the Stamping With Friends 3D Christmas Gift Blog Hop as we share fun and creative ideas to help you with your Christmas gift list. A handmade gift is a gift from the heart and you will be visiting with talented Stampin' Up! Demonstrators as they share their projects and ideas to help inspire you to create your own wonderful gifts for the holidays.

I often struggle with creating 3D projects, so I spent some time on Pinterest to come up with my gift idea for today's hop. The gift idea I found is so much and simple to create with just a few basic supplies. This Framed Dry Erase Shopping List is so much and would look great in someone's kitchen. In our house, it is not uncommon for someone to use the last of something and this Shopping List provides them with a way to let me know that I need to buy more when I head to the grocery store. The frame and Dry Erase Marker are from the Dollar Store and I decorated them with a piece of the Pattern Party Designer Series Paper and the Playful Alphabet Dies. The wonderful thing about this gift is that you can personalize it to suit the person who is receiving it to make it extra special.

Products Used:
Playful Alphabet Dies (item #152706)
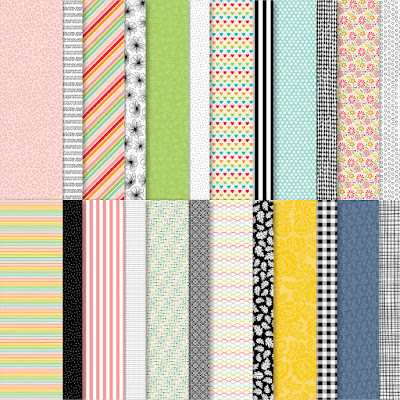
Pattern Party Designer Series Paper (item #155426) Host Reward
Basic Black Cardstock (item #121045)
8"x10" Frame from the Dollar Store
Black Dry Erase Marker from the Dollar Store

Pattern Party Designer Series Paper
9 7/8" x 7 7/8" for to cover the front of the back of the frame
3 1/4" x 1 5/8" to wrap around the Dry Erase Marker
Basic Black Cardstock
Die cut letters using the Playful Alphabet Dies


To create the background for this project, I added adhesive to the back of the designer series paper and attached it to the front of the backing for the frame. The Playful Alphabet Dies are the perfect size for creating the lettering for this project. I die cut the individual letters and attached them to designer series paper background towards the top. I used an alcohol wipe to clean the glass before assembling the frame. For the Dry Erase Marker, I cut a piece of the designer series paper and wrapped it around the bottom half of the marker and attached it with adhesive. It's a simple gift idea that is easy to create and you can change the message to personalize it. Some other ideas would be a To Do List, Birthday List, Upcoming Events, just to name a few.

Thank you for taking the time to visit my blog. I hope that my gift idea will help inspire you to look at fun ways to use your designer series paper to create wonderful personalized gifts. There are so many wonderful options to explore.

Now it's time to visit Karen's blog and see what wonderful gift ideas she has to share with us. Just click on the Next button below to visit her blog. Please leave us a comment and let us know what you like about our projects. I hope you enjoy the rest of our blog hop.
Roll Call
Linda Moore
Twila Davis
Donna Schnees
Kelly PlaceTaranto
Tricia Butts
Karen Egan
Victoria Littlewood
Tina Hewett
Betty Bickford
Linda Moore
Twila Davis
Donna Schnees
Kelly PlaceTaranto
Tricia Butts
Karen Egan
Victoria Littlewood
Tina Hewett
Betty Bickford
If you live in the U.S. and you do not have a Stampin' Up! Demonstrator, please contact me and I would be happy to help you with your creative projects. You may also visit my Online Store to place your order and have it shipped to you.
Until Next
Time
Happy
Stamping,
Tricia Butts
Independent Stampin' Up!
Demonstrator
Like What You
See? Visit My Online Store Here
Visit My Facebook Business Page for Updates & Ideas
Click here to Contact Me
Explore The Beautiful New Eden's Garden Collection
Click Below For More Details
Make Your Holiday Treats Special
With The Gifts Galore November Paper Pumpkin Kit
Click Below To Subscribe By November 10th
What a great idea!! Great gift x
ReplyDeleteLove the idea! Simple and useful. TFS!
ReplyDeleteVery useful 3D project and it shows off our gorgeous DSP!
ReplyDeleteI need to make one of those for myself!
ReplyDeleteWHat a fun and useful handmade gift. Great job!
ReplyDelete