Showing posts with label Abundant Beauty Decorative Masks. Show all posts

Wednesday, November 8, 2023

Around The World On Wednesday November Blog Hop Fall Color Challenge


Welcome to the Around The World On Wednesday November Blog Hop and this month we have a color challenge to share with you. We have been challenged to create our project using colors from the beautiful Fall image below. Our wonderful Design Team will be sharing their projects and ideas to showcase the colors they chose from this design. 
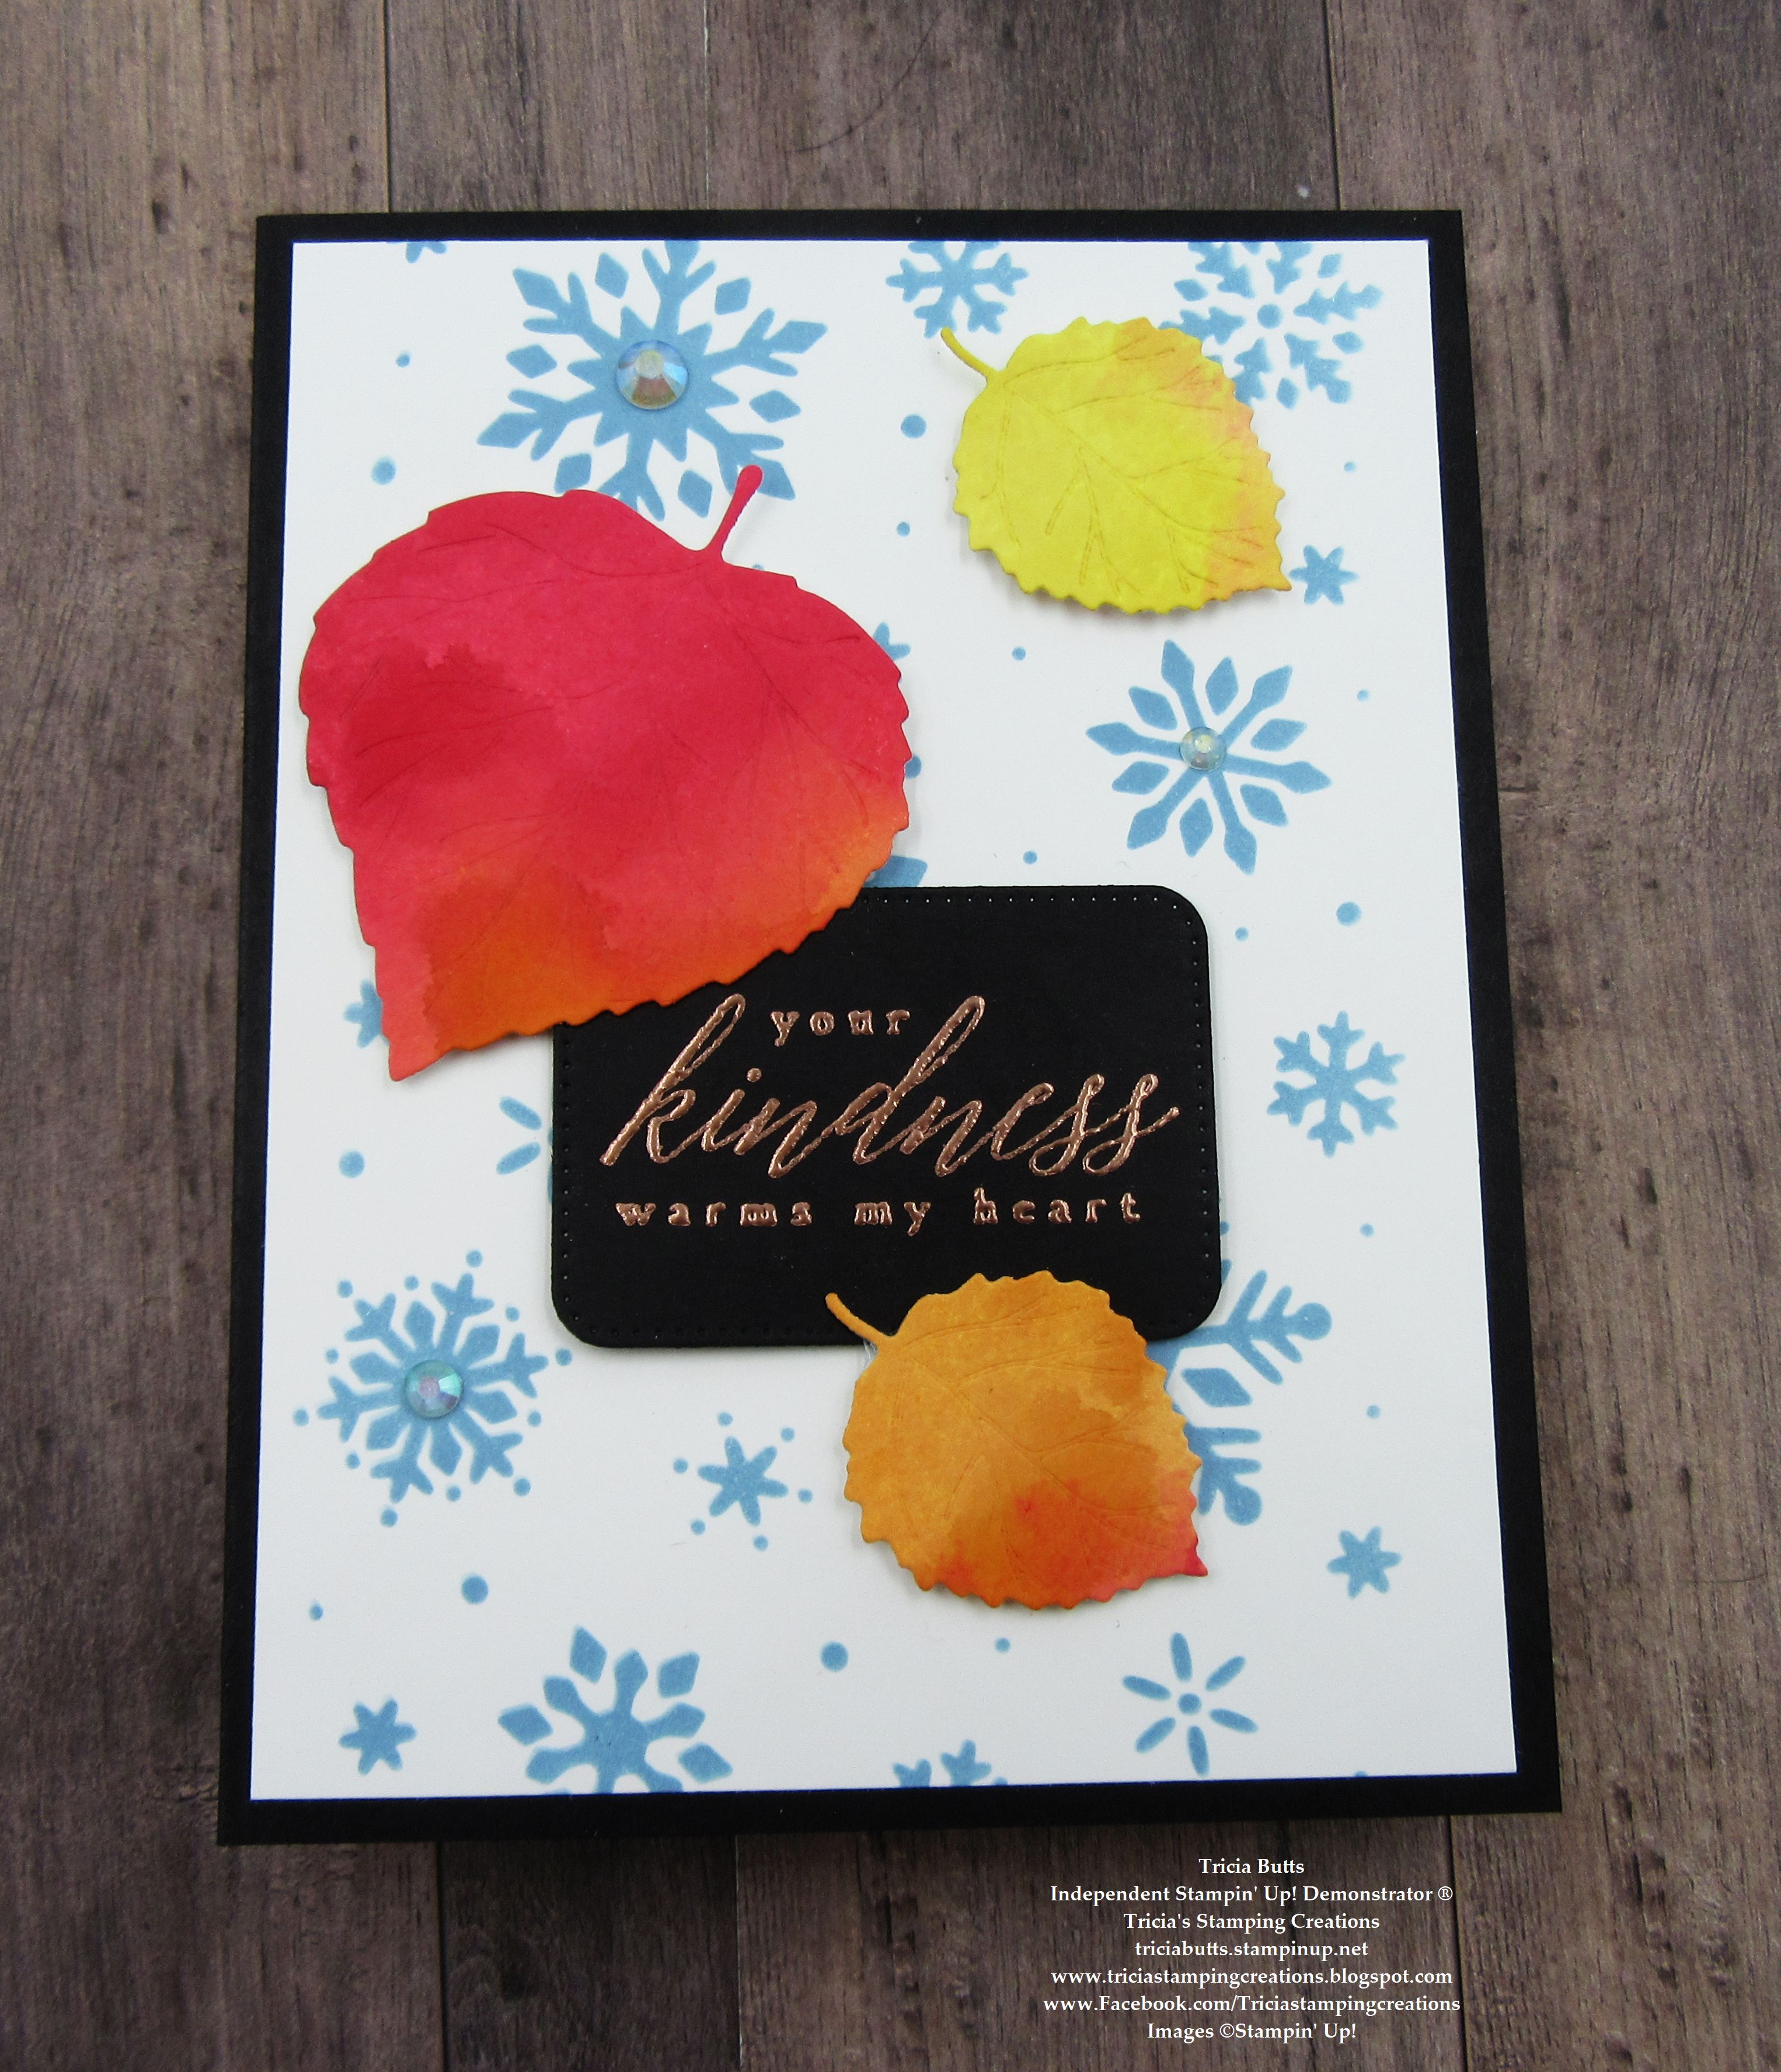
For my card design, I chose to use the Balmy Blue, Real Red, Pumpkin Pie, Crushed Curry, Basic White and Basic Black from the challenge image. I wanted to show what Fall can be like here in Colorado. I chose to combine the snowflakes from the Abundant Beauty Decorative Masks with the die cut leaves from the Aspen Trees Dies to represent the beautiful Fall leaves and the unexpected snowstorms we can have here during this unpredictable season. 
Products Used:
Perched In A Tree stamp set (item #159791)
Aspen Trees Dies (item #159798)
Nested Essentials Dies (item #161597)
Abundant Beauty Decorative Masks (item #162331)
Basic Black Cardstock (item #121045)
Basic White Cardstock (item #159276)
Balmy Blue Classic Ink Pad (item #147105)
Real Red Classic Ink Pad (item #147084)
Pumpkin Pie Classic Ink Pad (item #147086)
Crushed Curry Classic Ink Pad (item #147087)
Versamark Pad (item #102283)
Metallics Embossing Powders (item #155555)
Blending Brushes (item #153611)
Stampin' Spritzers (item #126185)
Iridescent Rhinestones Basic Jewels (item #158130)
Stampin' Dimensionals (item #104430)
Measurements:
Basic Black Cardstock
Card Base - 8 1/2" x 5 1/2" (Scored at 4 1/4")
Sentiment Label die cut with the Nested Essentials Dies
Basic White Cardstock
Card Front - 5 1/4" x 4" Snowflakes added with Abundant Beauty Decorative Masks
Leaves die cut with the Aspen Trees Dies
This card design is a combination of different techniques. For the leaves, I used a Watercolor Smoosh technique, combining Real Red, Pumpkin Pie and Crushed Curry Classic inks and spritzing them with water to create an intense background on Basic White cardstock. After drying the cardstock with my heat tool, I die cut the leaves to create the beautiful Fall colors from the challenge image. For the background of my card design, I chose to use Balmy Blue Classic ink to represent the blue sky from the challenge image. I used the snowflakes mask with a Blending Brush to create the feeling of falling snow, which is not uncommon here in Colorado in the Fall. The sentiment was heat embossed with Copper embossing powder onto a Basic Black label die cut with the Nested Essentials Dies. For me, the Copper represented the metal frame of the Eiffel Tower. The Iridescent Rhinestones add a touch of bling to the snowflakes to create the reflection of the sunlight. This was a fun challenge and I loved taking the different colors from the challenge design to help create my card design. 
Thank you for taking the time to visit my blog. I hope that my card design will help inspire you to try creating your own beautiful projects using this color challenge. There are so many colors to choose from to help you create your own work of art. 
Now it's time to visit Theresa's blog and see what she has created for this month's Fall Color Challenge. Just click the Next button below to visit her blog or use the Roll Call List to find your way. We would love it if you would leave us a comment and let us know what you liked about our projects. I hope you enjoy the rest of our blog hop. 

Roll Call List

If you live in the U.S. and do not have a Stampin' Up! Demonstrator, please contact me and I would be happy to help you with your creative projects. You may also visit my Online Store to place your order and have it shipped to you. 

Until Next Time

Happy Stamping,

Tricia Butts
Independent Stampin' Up! Demonstrator

Like What You See? Visit My Online Store Here

Visit My Facebook Business Page for Updates & Ideas

Click here to Contact Me


New Online Exclusives Products
Now Available While Supplies Last
Click Below To Visit My Online Store

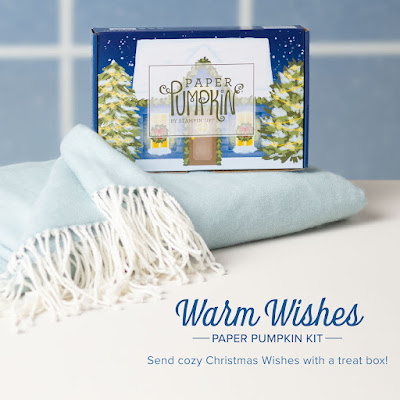
Send Holiday Treats
With The Warm Wishes Paper Pumpkin Kit
Click Below To Subscribe By November 10th

Get Creative For The Holidays
With The September-December 2023 Mini Catalog
Click Below To Visit My Online Store


Wednesday, October 18, 2023

New At SU October Blog Hop Sketch Challenge Heartfelt Hexagon

Welcome to the New At SU October Blog Hop and this month we have a Sketch Challenge to help spark your creativity. Our wonderful Design Team will be sharing their projects and ideas using products from the September-December 2023 Mini Catalog to help inspire you to create your own wonderful projects with this sketch.
For my card, I wanted to create a pretty floral design combining the new Heartfelt Hexagon Bundle with the Abundant Beauty Decorative Masks. I had recently created a project using Shimmery White Embossing Paste colored with Balmy Blue ink and I used the left over paste on a piece of Basic White cardstock for a future project. Today as I was working out my design, I realized that it would make the perfect background for my card design. For the flowers I went with pretty pinks and the leaves are bright green and I love how they pop against the Balmy Blue background. A little Gold embossing for the sentiment and I was able to create a pretty card design using the sketch for today's challenge. 
Products Used:
Heartfelt Hexagon Bundle (item #162889)
Abundant Beauty Decorative Masks (item #162331)
Foursquare Decorative Masks (item #161285)
Balmy Blue Cardstock (item #146982)
Basic White Cardstock (item #159276)
Bubble Bath Classic Ink Pad (item #161664)
Fresh Freesia Classic Ink Pad (item #155611)
Daffodil Delight Classic Ink Pad (item #147094)
Lemon Lime Twist Classic Ink Pad (item #147145)
Parakeet Party Classic Ink Pad (item #159208)
Balmy Blue Ink Refill (item #147168)
Versamark Pad (item #102283)
Metallics Embossing Powders (item #155555)
Shimmery White Embossing Paste (item #145645)
Pastel Adhesive Backed Sequins (item #160387)
Stampin' Dimensionals (item #104330)
Palette Knives (item #142808)
Measurements:
Balmy Blue Cardstock
Card Base - 8 1/2" x 5 1/2" (Scored at 4 1/4")
Strip - 1" x 4"
Basic White Cardstock
3 Flowers created with the Abundant Beauty Decorative Masks
5 Leaves created with the Abundant Beauty Decorative Masks
Sentiment Label stamped and punched out with the Heartfelt Hexagon Bundle
Sometimes when I design cards, I have a set design in mind. Today's card was more of an organic flow as I started with the embossed background and worked forward from there to come up with the finished design. To create the background, I mixed a couple of drops of Balmy Blue ink with some Shimmery White Embossing Paste and applied it over the mask from the Foursquare Decorative Masks onto a piece of Basic White cardstock. Note: the embossing paste dries very quickly, so make sure to clean your masks and palette knives as soon as you are finished with some warm soapy water to remove any traces of the paste before it hardens.
I loved being able to transform these flowers from traditional sunflowers to soft and pretty pink daisies using the Abundant Beauty Decorative Masks. I used a combination of Bubble Bath and Fresh Freesia to create the petals and Daffodil Delight and Lemon Lime Twist for the centers. For the leaves, I used a combination of Lemon Lime Twist and Parakeet Party. I fussy cut the flowers and leaves ready to arrange them on the card front. I stamped small leaves using images from the Heartfelt Hexagon stamp set onto the embossed card front using Parakeet Party Classic ink. I attached the Balmy Blue cardstock strip across the front of the card front and then attached the card front to the Balmy Blue card base. For the sentiment label, I stamped and heat embossed the image with Gold embossing powder and punched it out with the coordinating Heartfelt Hexagon Punch. I added the sentiment to the Balmy Blue strip with Stampin' Dimensionals and then added the flowers and leaves around it to create the final design. To complete the card, I added some Balmy Blue Pastel Adhesive Backed Sequins for a touch of bling. 
Thank you for taking the time to visit my blog. I hope that my card design will help inspire you to create your own beautiful projects to share with family and friends. There are so many wonderful options to explore in the September-December 2023 Mini Catalog.
Please take the time to visit with the Design Team and their wonderful projects by clicking on the links in the Roll Call List. We would appreciate it if you would leave us a comment and let us know what you enjoyed about our projects.
If you live in the U.S. and do not have a Stampin' Up! Demonstrator, please contact me and I would be happy to help you with your creative projects. You may also visit my Online Store to place your order and have it shipped to you. 


Until Next Time

Happy Stamping,

Tricia Butts
Independent Stampin' Up! Demonstrator

Like What You See? Visit My Online Store Here

Visit My Facebook Business Page for Updates & Ideas

Click here to Contact Me


Celebrate Stampin' Up!'s 35th Anniversary
With Your Choice Of Starter Kit
Click Below For More Details

Get Creative For The Holidays
With The September-December 2023 Mini Catalog
Click Below To Visit My Online Store


Saturday, September 30, 2023

Ink. Stamp. Share. September Monthly Blog Hop Autumn

As September comes to an end, we are all embracing Autumn and getting in the spirit creating projects for the new season. Our Ink. Stamp. Share Blog Design Team is looking forward to sharing their projects and ideas to help spark your creativity for Fall.
The early signs of Autumn have arrived and the colors are already starting to change. The bright colors of Summer are being replaced by the warm, muted tones of Fall and I am loving the chance to create projects with a new color palette. For my card design, I chose to use the new Abundant Beauty Decorative Masks to create a lovely sunflower design. Here in Colorado, the sunflowers are putting on their final display and I love seeing these beautiful flowers along the road side. I chose to use Crushed Curry with a touch of Pumpkin Pie for the flowers and Pecan Pie with Early Espresso for the centers. The leaves are a combination of Old Olive with Mossy Meadow. This clean and simple card design is a wonderful way to show the transition of seasons and would work well for a variety of occasions.
Products Used:
Abundant Beauty Decorative Masks (item #162331)
Translucent Florals stamp set (item #162243)
Something Fancy Dies (item #160424)
Mossy Meadow Cardstock (item #133676)
Basic White Cardstock (item #159276)
Mossy Meadow Classic Ink Pad (item #147111)
Old Olive Classic Ink Pad (item #147090)
Crushed Curry Classic Ink Pad (item #147087)
Pumpkin Pie Classic Ink Pad (item #147086)
Pecan Pie Classic Ink Pad (item #161665)
Early Espresso Classic Ink Pad (item #147114)
Versamark Pad (item #102283)
Metallics Embossing Powders (item #155555)
Blending Brushes (item #153611)
Festive Pearls (item #159963)
Stampin' Dimensionals (item #104430)
Measurements:
Mossy Meadow Cardstock
Card Base -8 1/2" x 5 1/2" (Scored at 41/4")
Sentiment Label die cut with the Something Fancy Dies
Basic White Cardstock
Card Front - 5 1/4" x 4"
The Abundant Beauty Decorative Masks are the star of the show with this card design. I love how each layer lines up to make it so simple to create a beautiful design. The notches and numbers in the top left corner help you to know what sequence is needed to create your beautiful sunflowers. I used Blending Brushes to apply the ink colors and I love the softness that they create. For the sentiment, I heat embossed the image from the Translucent Florals stamp set with Gold embossing powder. I added the sentiment to the card front with Stampin' Dimensionals and finished off the card with a couple of Gold pearls for a touch of bling. I used this design for a recent card swap and I loved how easy it was to create a lot of cards in a relatively short amount of time with these masks. I hope it inspires you to explore creating your own beautiful projects for Autumn and beyond.
Thank you for taking the time to visit my blog. I hope that my card design helped get you in the mood for creating your own Autumn themed projects to share with family and friends. There are so many wonderful options available to help you get creative. 
Please take the time to hop along our blog hop and visit with our Design Team by clicking on the links in the Roll Call List below. We would appreciate it if you would leave us a comment and let us know how our projects inspired you. 

If you live in the U.S. and do not have a Stampin' Up! Demonstrator, please contact me and I would be happy to help you with your creative projects. You may also visit my Online Store to place your order and have it shipped to you. 

Until Next Time

Happy Stamping,

Tricia Butts
Independent Stampin' Up! Demonstrator

Like What You See? Visit My Online Store Here

Visit My Facebook Business Page for Updates & Ideas

Click here to Contact Me


Check Out The Latest Additions
To The Online Exclusives
Visit My Online Store To View These Beautiful Papers

Get Creative For The Holidays 
With The September-December 2023 Mini Catalog
Click Below To Visit My Online Store


Saturday, September 9, 2023

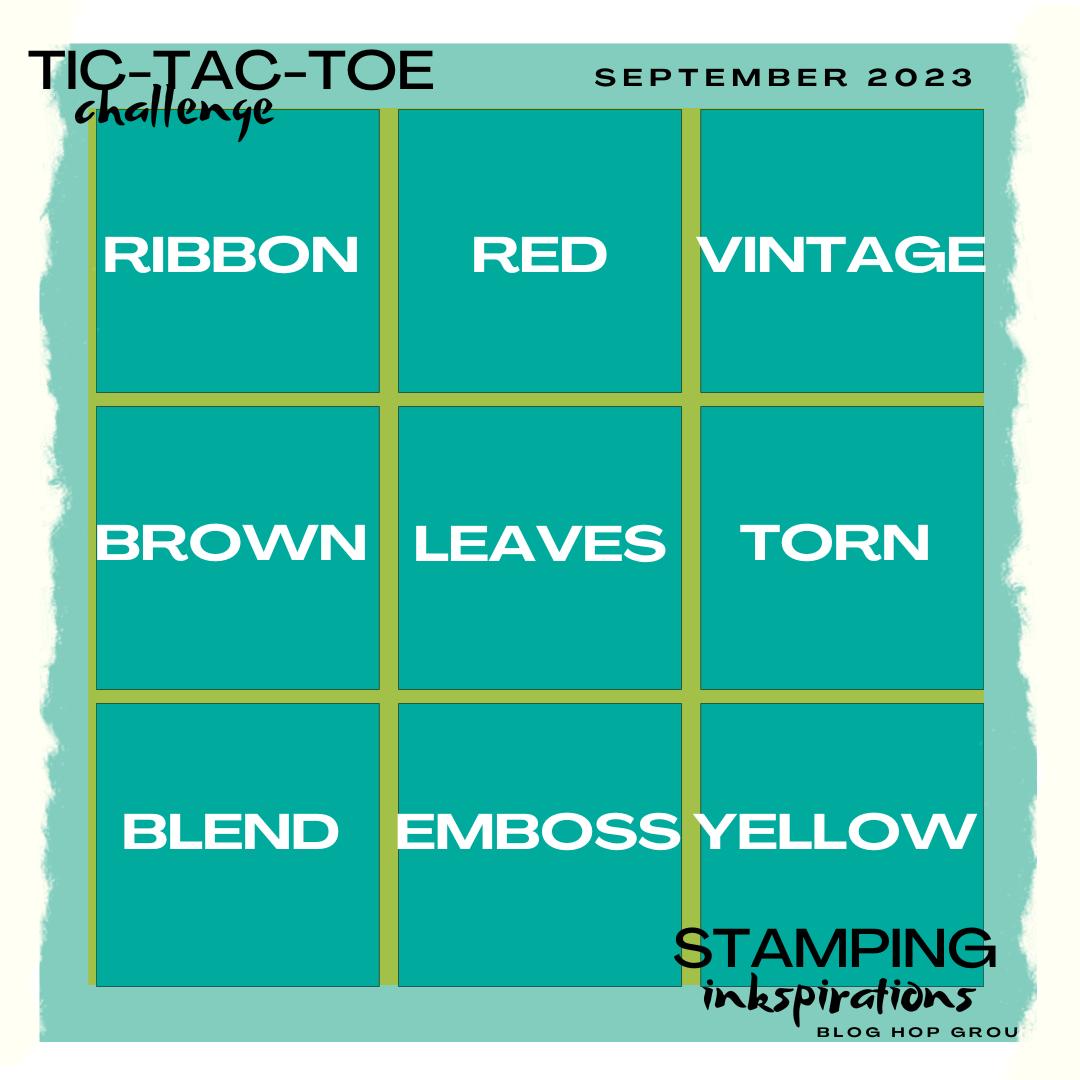
Stamping Inkspirations September Blog Hop Tic-Tac-Toe Challenge

 Welcome everyone to the Stamping Inkspirations September Blog Hop as we explore this month's Tic-Tac-Toe Challenge. With so many wonderful possibilities to choose from, I am excited to see what our Design Team has come up with to inspire you to get creative.
When I looked at this Tic-Tac-Toe board, it definitely put me in the mood for Fall. I chose to use the middle vertical row with Red, Leaves and Emboss but I must admit, I did add some of the other elements that were mentioned in other rows because I was having so much fun. My Fall themed card is a combination of beautiful colors and wonderful textures with a hint of Gold embossing to add an elegant touch.
Products Used:
Perched In A Tree stamp set (item #159791)
Aspen Tree Dies (item #159798)
Nested Essentials Dies (item #161597)
Abundant Beauty Decorative Masks (item #162331)*
Distressed Tile 3D Embossing Folder (item #162189)*
Early Espresso Cardstock (item #119686)
Crumb Cake Cardstock (item #120953)
Cherry Cobbler Cardstock (item #119685)
Pumpkin Pie Cardstock (item #105117)
Crushed Curry Cardstock (item #131199)
Early Espresso Classic Ink Pad (item #119686)
Crumb Cake Classic Ink Pad (item #147116)
Crushed Curry Classic Ink Pad (item #147087)
Pumpkin Pie Classic Ink Pad (item #147086)
Old Olive Classic Ink Pad (item #147090)
Cherry Cobbler Classic Ink Pad (item #147083)
Versamark Pad (item #102283)
Metallics Embossing Powders (item #155555)
Blending Brushes (item #153611)
Sponge Daubers (item #133773)
Linen Thread (item #104199)
Brushed Metallic Dots (item #156506)
Stampin' Dimensionals (item #104430)
Mini Glue Dots (item #103683)
*New Products in the September-December 2023 Mini Catalog
Measurements:
Early Espresso Cardstock
Card Base - 8 1/2" x 5 1/2" (Scored at 4 1/4")
Sentiment Label die cut with the Nested Essentials Dies
Crumb Cake Cardstock
Card Front - 5 1/4" x 4" Embossed with the Distressed Tile 3D Embossing Folder
Cherry Cobbler Cardstock
Large Leaf die cut with the Aspen Trees Dies
Crushed Curry Cardstock 
2 Small Leaves die cut with the Aspen Trees Dies
Pumpkin Pie Cardstock
2 Small Leaves die cut with the Aspen Trees Dies
I don't know about you, but I am ready for Fall. I love the beautiful colors associated with this season and I decided to go all out for this card design and have some fun. My color palette includes Cherry Cobbler, Pumpkin Pie, Crushed Curry, Old Olive, Crumb Cake and Early Espresso. For the card front, I started by using the leaves mask from the Abundant Beauty Decorative Masks and created a subtle background design using Crumb Cake Classic ink with a Blending Brush. I then randomly stamped over the background using the detailed dots image from the Perched In A Tree stamp set with Old Olive Classic ink, stamped off once. Next, I embossed this layer with the new Distressed Tile 3D Embossing Folder to add some wonderful texture. To bring out some of the embossed detail, I used a Sponge Dauber to apply some Early Espresso Classic ink over the raised embossing and around the edges. I love how this gives the background a vintage, distressed look. 
To create the focal design, I die cut the leaves and then used Sponge Daubers to add color around the edges and to help bring out the detail in the die cuts. I used Cherry Cobbler Classic ink on the large Cherry Cobbler leaf to deepen the color around the top and edges of the leaf. For the Crushed Curry leaves, I added Crushed Curry Classic ink to one of the leaves and Old Olive to the other leaf to create that wonderful variation of color you get as the leaves change in the Fall. For the Pumpkin Pie leaves, I sponged Pumpkin Pie Classic ink around the edge of one leaf and Cherry Cobbler around the edge of the other leaf to continue the variations in colors. The sentiment label was heat embossed using Gold embossing powder and I added it to the center of the card front with Stampin' Dimensionals. The leaves have been arranged to appear like they are falling off a tree and I layered the large Cherry Cobbler leaf over the bottom of the sentiment label and the Crushed Curry leaf slightly over the top edge to tie everything together. For embellishments, I wanted to keep it very simple, so I added a double bow tied with Linen Thread to the stems of the top leaves and Gold Brushed Metallic Dots to the sentiment label to finish off the design. I am so happy with how this card design turned out and can't wait to create more Fall projects with these beautiful colors and products. 
Thank you for taking the time to visit my blog. I hope that my card design will help inspire you try this Tic-Tac-Toe challenge and get excited about creating for Fall. There are so many wonderful options to choose from to help spark your creativity. 
Now it's time to visit Aurelie's wonderful blog and see what she has created with this month's challenge. Just click the Next button below or use the Roll Call List to find your way. We would appreciate it if you would leave us a comment and let us know how our projects inspired you. I hope you enjoy the rest of our blog hop. 
Roll Call List

If you live in the U.S. and do not have a Stampin' Up! Demonstrator, please contact me and I would be happy to help you with your creative projects. You may also visit my Online Store to place your order and have it shipped to you. 
Until Next Time

Happy Stamping,

Tricia Butts
Independent Stampin' Up! Demonstrator

Like What You See? Visit My Online Store Here

Visit My Facebook Business Page for Updates & Ideas

Click here to Contact Me


Get Creative For The Holidays & Beyond
With The September-December 2023 Mini Catalog
Click Below To Visit My Online Store


Friday, September 1, 2023

We Create September Blog Hop Jogging My Memory

Welcome to the We Create September Blog Hop as we explore the theme "Jogging My Memory". Our Design Team will be sharing their projects and ideas inspired by this month's theme. With so many possibilities, I wonder what wonderful creations they will come up with.
For my card design, I chose to focus on memories from my early Christmases here in the United States. As a girl who was used to hot Summer Christmases, it was quite an adjustment getting used to the cold and snow those first few years. I remember my first Christmas in Alaska and how beautiful everything was covered with snow, a true White Christmas. Whenever I see the Coca Cola Christmas commercials with the polar bears looking up at the Northern Lights, I think of those special memories. So, when I saw the Beary Cute stamp set in the new September-December 2023 Mini Catalog, I knew that I wanted to create a card that reflected those memories. The beautiful snowflakes falling onto the card front are created with one of the new Abundant Beauty Decorative Masks with Balmy Blue Classic ink. I love how this clean and simple Christmas card has captured those wonderful memories from long ago.
Products Used:
Beary Cute stamp set (item #162016)*
Deckled Circles Dies (item #162286)*
Abundant Beauty Decorative Masks (item #162331)*
Inked & Tiled Punch Pack (item #161167)
Balmy Blue Cardstock (item #146982)
Basic White Cardstock (item #159276)
Balmy Blue Classic Ink Pad (item #147105)
Versamark Pad (item #102283)
Basics Embossing Powders (item #155554)
Blending Brushes (item #153611)
Pastel Adhesive Backed Sequins (item #160387)
Stampin' Dimensionals (item #104430)
 *Products from the September-December 2023 Mini Catalog       available September 6th, 2023
Measurements:
Balmy Blue Cardstock
Card Base - 8 1/2" x 5 1/2" (Scored at 4 1/4")
Deckled Circle die cut with the Deckled Circles Dies
Sentiment Label - 3/4" x 5" Strip. Ends punched with the Inked & Tiled Punch Pack
Basic White Cardstock
Card Front - 5 1/4" x 4"
To create this beautiful card design, I used the snowflakes mask from the Abundant Beauty Decorative Masks to create a soft and pretty background. I used Balmy Blue Classic ink with a Blending Brush to layer color over the mask. For the focal image, I heat embossed the bear image with White embossing powder onto a circle of Balmy Blue cardstock that I die cut using the new Deckled Circles Dies. I repeated the process with the sentiment and used the cross style punch from the Inked & Tiled Punch Pack to create the decorative ends for the sentiment strip. I attached both the focal circle and the sentiment to the card front using Stampin' Dimensionals to pop them up. For a touch of bling, I added several blue sequins from the Pastel Adhesive Backed Sequins to give the snow a little sparkle. 
Thank you for taking the time to visit my blog. I hope that my card design will help inspire you to create your own beautiful projects. Memories can be a wonderful source of inspiration to help spark your creativity.
Now it's time to visit Kimberley's blog and see what she has created this month. Just click on the Next button below to visit her blog. We would love it if you would leave us a comment and let us know what you liked about our projects. 


If you live in the U.S. and do not have a Stampin' Up! Demonstrator, please contact me and I would be happy to help you with your creative projects. You may also visit my Online Store to place your order and have it shipped to you. 

Until Next Time

Happy Stamping,

Tricia Butts
Independent Stampin' Up! Demonstrator

Like What You See? Visit My Online Store Here

Visit My Facebook Business Page for Updates & Ideas

Click here to Contact Me 


Coming Soon
September-December 2023 Mini Catalog
Launches September 6th, 2023

Express Love & Gratitude
With The September Paper Pumpkin Kit
Click Below To Subscribe By September 10th