
Welcome to the Colour Combo March Blog Hop as we explore creating projects with Bermuda Bay, Balmy Blue and Soft Sea Foam. You will be visiting with talented Stampin' Up! Demonstrators as they share their projects and ideas to help inspire you and spark your creativity.
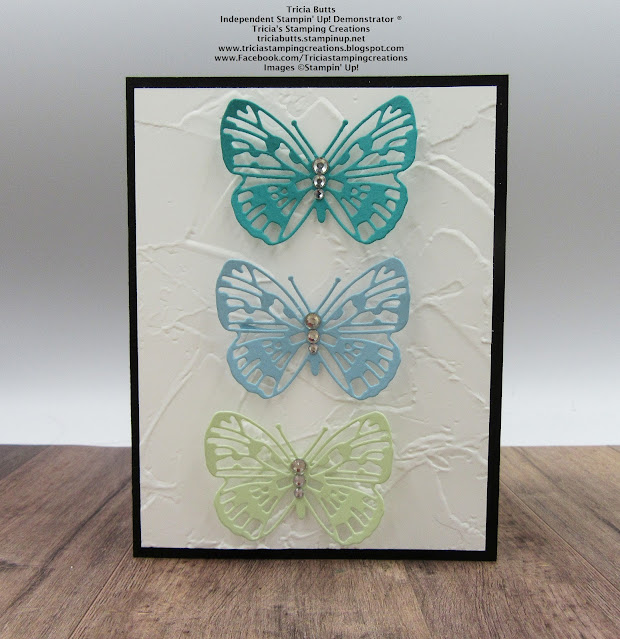
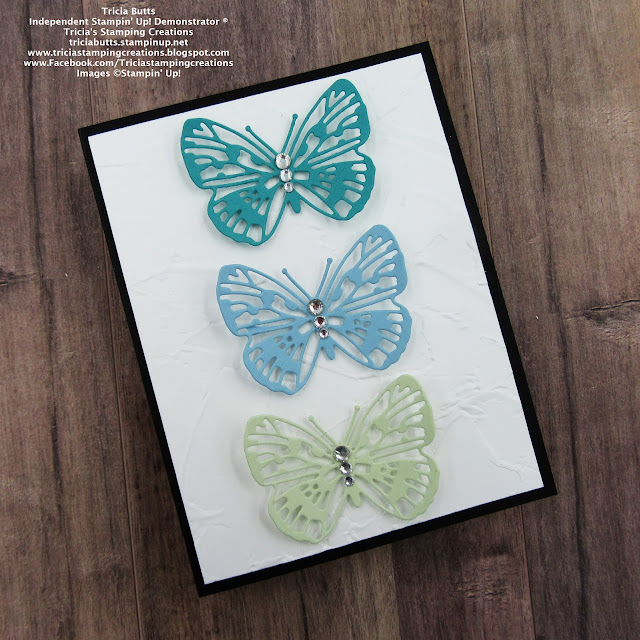
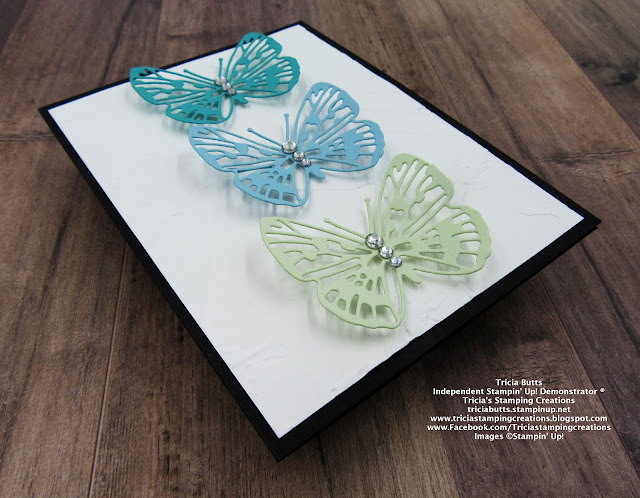
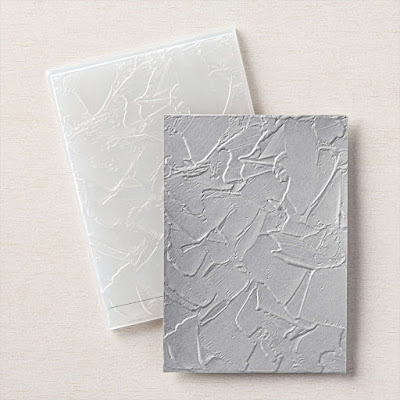
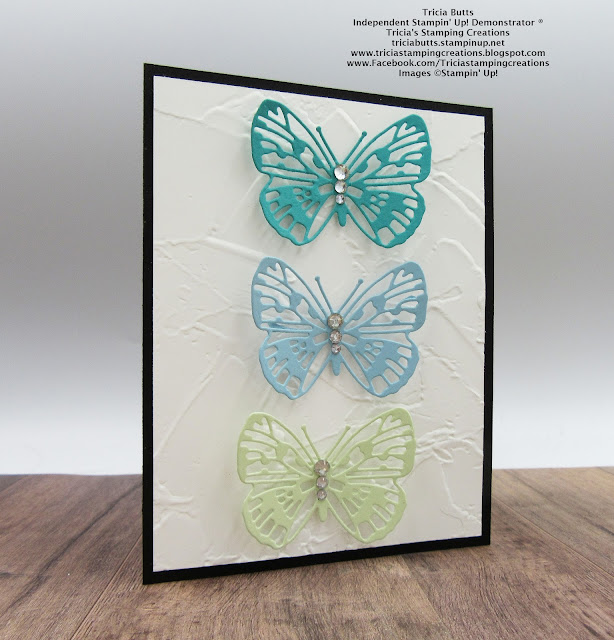
I love how these three colors work together and I wanted to showcase them in a bold yet simple design. For this card, I decided to use the Brilliant Wings Dies and I paired it with the Painted Texture 3D Embossing Folder to add texture to the background. The Black card base provides a bold frame for the Basic White background which helps make the butterflies pop. It's not often that I create a card that has no stamping, but I am really happy with how this no-stamping card design turned out.
Products Used:
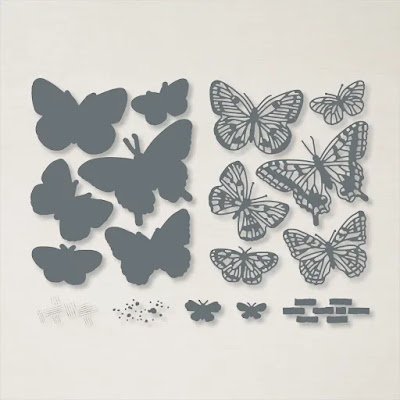
Brilliant Wings Dies (item #155523)
Painted Texture 3D Embossing Folder (item #154317)
Basic Black Cardstock (item #121045)
Basic White Cardstock (item #159276)
Bermuda Bay Cardstock (item #131197)
Balmy Blue Cardstock (item #146982)
Soft Sea Foam Cardstock (item #146988)
Basic Rhinestone Jewels (item #144220)
Mini Stampin' Dimensionals (item #144108)
Measurements:
Basic Black Cardstock
Card Base - 8 1/2" x 5 1/2" (Scored at 4 1/4")
Basic White Cardstock
Card Front - 5 1/4" x 4"
Bermuda Bay Cardstock
Detailed Butterfly die cut with Brilliant Wings Dies
Balmy Blue Cardstock
Detailed Butterfly die cut with Brilliant Wings Dies
Soft Sea Foam Cardstock
Detailed Butterfly die cut with Brilliant Wings Dies
Thank you for taking the time to visit my blog. I hope that my card design will help inspire you to create your own beautiful projects with this color combination. There are so many wonderful possibilities available using Stampin' Up!'s coordinating products.

Now it's time to visit Mo's wonderful blog to see what she has created with this month's color combination. Just click the Next button below to visit her blog. We would appreciate it if you would leave us a comment and let us know what you liked about our projects. I hope you enjoy the rest of our blog hop.

If you live in the U.S. and do not have a Stampin' Up! Demonstrator, please contact me and I would be happy to help you with your creative projects. You may also visit my Online Store to place an order and have it shipped to you.

Until Next
Time
Happy
Stamping,
Tricia Butts
Independent Stampin' Up!
Demonstrator
Like What You
See? Visit My Online Store Here
Visit My Facebook Business Page for Updates & Ideas
Click here to Contact Me
Save 20% With The Savings Are In Bloom Promotion
During The Month Of March
Click Below To Visit My Online Store
During The Month Of March
Click Below To Visit My Online Store
Available For A Limited Time
The Amazing Waves Of The Ocean Collection
Click Below For More Details
Your card is so lovely
ReplyDeleteThank you Sonja. These butterflies are so beautiful.
DeleteGreat card Tricia, love the clean and simple lines x
ReplyDeleteThank you Mo. I love creating clean and simple card designs.
DeleteSo elegant!
ReplyDeleteThank you Mickey. I love how this card turned out.
DeleteThis is so pretty! I love your butterflies!
ReplyDeleteThank you Tanya. These intricate butterflies are perfect for this card design.
DeleteI love your bold simple design! Sometimes less is more!
ReplyDeleteThank you Annette. It was a great way to showcase this color combination.
Delete