Showing posts with label Bouquet of Love Hybrid Embossing Folder. Show all posts

Saturday, March 12, 2022

Stamping Inkspirations March Blog Hop Embossing Techniques

Welcome to the Stamping Inkspirations March Blog Hop as we showcase projects created using Embossing Techniques. Whether you love heat embossing or dry embossing, there are so many different ways to create with these wonderful techniques. You will be visiting with our wonderful Design Team Members as they share their projects and ideas to help inspire you to create your own wonderful creations.
I love embossing, so I decided to combine heat embossing with dry embossing to create my card design. For this card I chose the Love & Happiness Bundle which includes the beautifully detailed Bouquet of Love Hybrid Embossing Folder, which also includes coordinating dies. For the sentiment, I heat embossed the image from the Celebrating You stamp set with Gold embossing to add an elegant touch to the design. 
Products Used:
Celebrating You stamp set (item #158028)
Love & Happiness Bundle (item #157642)
Subtles 6"x6" Designer Series Paper (item #155229)
Blushing Bride Cardstock (item #131198)
Very Vanilla Cardstock (item #101650)
Soft Sea Foam Cardstock (item #146988)
Versamark Pad (item #102283)
Metallics Embossing Powders (item #155555)
Pearl Basic Jewels (item #144219)
Stampin' Dimensionals (item #104430)
Measurements:
Blushing Bride Cardstock
Card Base - 5 1/2" x 4 1/2" (Scored at 4 1/4")
Card Front - 5 1/4" x 4"
Very Vanilla Cardstock
Layer 1 - 5 3/8" x 4 1/8"
Embossed Heart die cut with the Bouquet of Love Hybrid Embossing Folder
Sentiment Label die cut with the Bouquet of Love Hybrid Embossing Folder (dies)
Blushing Bride Designer Series Paper
Two large flowers and two small flowers die cut with the Bouquet of Love Embossing Folder (dies)
Soft Sea Foam Cardstock
Four leaves die cut with the Bouquet of Love Embossing Folder (dies)
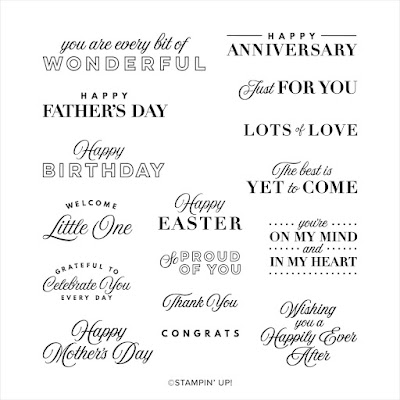
This pretty card design can be used for a variety of occasions. I had considered using one of the sentiments from the Love & Happiness stamp set from the bundle, but decided instead to use the Celebrating You stamp set. The card front was embossed and the heart die cut using the Bouquet of Love Hybrid Embossing Folder and I attached it to the Very Vanilla cardstock layer with Stampin' Dimensionals. For the Very Vanilla heart I die cut and embossed it and placed it inside the heart opening of the card front. After heat embossing the sentiment with Gold embossing powder onto the label, I attached it to card front across the Very Vanilla heart with Stampin' Dimensionals to pop it up. To embellish the card design, I added a flower to each end of the label using die cut flowers from the Blushing Bride Designer Series Paper and added leaves die cut from Soft Sea Foam cardstock. I used Basic Pearl Jewels to create the centers of the flowers and added three of the smallest pearls to embellish the Very Vanilla embossed heart. 
Thank you for taking the time to visit my blog. I hope that my card design will help inspire you to explore the wonderful world of embossing to help you create your own beautiful projects. There are so many amazing possibilities to explore. 
Now it's time to visit Karen's blog and see what she has to share with us. Just click on the Next button to visit her blog or use the Roll Call List below to find your way. We would love it if you would leave us a comment and let us know what you liked about our projects. I hope you enjoy the rest of our blog hop. 

If you live in the U.S. and do not have a Stampin' Up! Demonstrator, please contact me and I would be happy to help you with your creative projects. You may also visit my Online Store to place your order and have it shipped to you. 

Until Next Time

Happy Stamping,

Tricia Butts
Independent Stampin' Up! Demonstrator

Like What You See? Visit My Online Store Here

Visit My Facebook Business Page for Updates & Ideas

Click here to Contact Me 


Save 20% With The Savings Are In Bloom Promotion
During The Month Of March
Click Below To Visit My Online Store

Available For A Limited Time
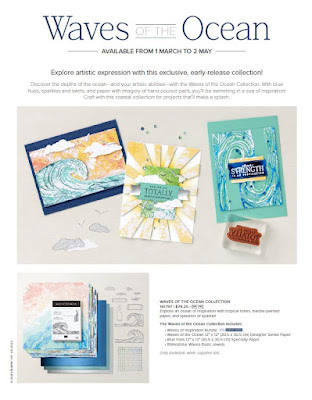
The Amazing Waves Of The Ocean Collection
Click Below For More Details


Saturday, January 22, 2022

Stamping With Friends Valentine's Blog Hop

 
Welcome to the Stamping With Friends Valentine's Blog Hop as we share fun and creative ideas and projects to help inspire you. You will be visiting with our talented Design Team as they showcase Stampin' Up! products to help spark your creativity. 
For my Valentine's card, I chose to use the beautiful Love & Happiness Bundle from the January-June 2022 Mini Catalog. I love the pretty embossing and coordinating dies in the Bouquet of Love Hybrid Embossing Folder and the Love & Happiness stamp set has a wonderful assortment of beautiful sentiments for a variety of occasions. 
Products Used:
Love & Happiness Bundle (item #157642)
Blushing Bride Cardstock (item #131198z)
Basic White Cardstock (item #159276)
Versamark Pad (item #102283)
Metallics Embossing Powders (item #155555)
Clear Wink of Stella Glitter Brush (item #141897)
Iridescent Rhinestone Basic Jewels (item #158130)
Stampin' Seal Adhesive (item #152813)
Measurements:
Blushing Bride Cardstock
Card Base - 8 1/2" x 5 1/2"
Heart Layer - 5 1/4" x 4" embossed and die cut with the Bouquet of Love Hybrid Embossing Folder (item #157641)
Basic White Cardstock
Card Front -5 1/4" x 4" embossed and die cut with the Bouquet of Love Hybrid Embossing Folder (item #157641)
Sentiment Label die cut with the Bouquet of Love Hybride Embossing Folder (Dies)
This clean and simple card design is easy to create and the combination of the embossed background and Gold embossing for the sentiment give it an elegant, romantic look. To create the card front, I embossed and die cut the Basic White cardstock layer with the Bouquet of Love Hybrid Embossing Folder to create the opening in the center. I repeated the same with the Blushing Bride cardstock layer so that the heart would fit inside the Basic White card front layer. Note: you can create a second card using the Blushing Bride cardstock layer as the card front and the Basic White embossed heart for the focal image. Using Clear Wink of Stella, I colored the raised embossed areas of the Blushing Bride Heart to add shimmer. I attached the card front and heart to the Blushing Bride card base with Stampin' Seal Adhesive so that they lay flat against the card base. I heat embossed the sentiment from the Love & Happiness stamp set with Gold embossing powder onto the sentiment label and attached it to the center of embossed heart with Stampin' Dimensionals. To finish off the design, I added Iridescent Rhinestone Basic Jewels to the card front and sentiment label for a touch of bling. It is a very simple card to create but has wonderful detail to give it that Wow factor. 
Thank you for taking the time to visit my blog. I hope that my card design will help inspire you to create your own wonderful Valentine's Day projects to give to family and friends.
Now it's time to visit Rachael's blog and see what she has to share with us. Just click on the Next button to visit her blog or use the Roll Call List below to find your way. Please leave us a comment and let us know what your favorite thing is about our projects. I hope you enjoy the rest of our blog hop. 


If you live in the U.S. and do not have a Stampin' Up! Demonstrator, please contact me and I would be happy to help you with your creative projects. You may also visit my Online Store to place your order and have it shipped to you.

Until Next Time

Happy Stamping,

Tricia Butts
Independent Stampin' Up! Demonstrator

Like What You See? Visit My Online Store Here

Visit My Facebook Business Page for Updates & Ideas

Click here to Contact Me


Explore Your Creativity

With The January-June 2022 Mini Catalog

Click Below To Visit My Online Store


Earn Exclusive Free Products
During Sale-a-bration
Click Below For More Details


Saturday, December 11, 2021

Ink. Stamp. Share. December Showcase Blog Hop

Welcome to the Ink. Stamp. Share. December Showcase Blog Hop as we share the projects we are currently working on. You will be visiting with talented Stampin' Up! Demonstrators as they share their projects and ideas to help inspire you to get creative. Whether it's last minute holiday projects or Sneak Peeks from the new January-June 2021 Mini Catalog or 2022 Sale-a-bration Catalog, there is something for everyone. I hope that our projects will help to spark your creativity and encourage you to indulge in a little creative therapy. 

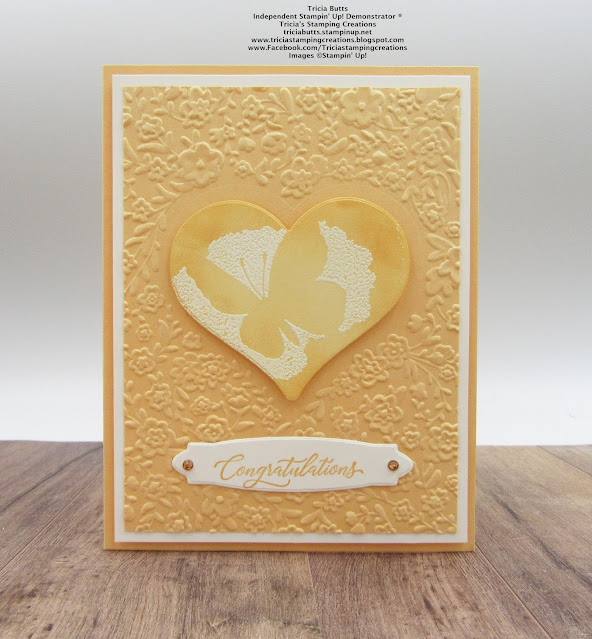
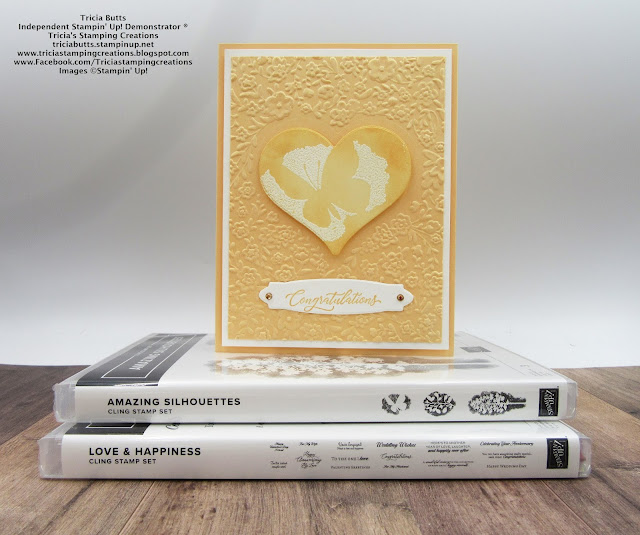
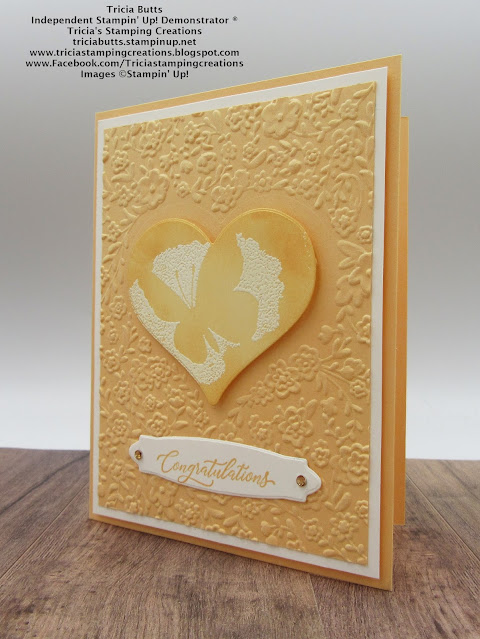
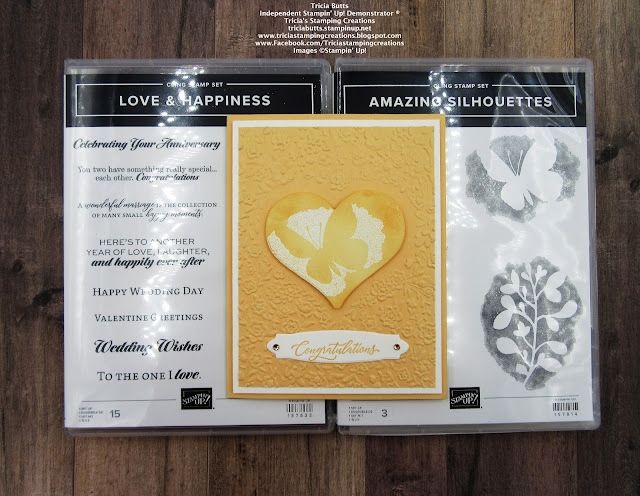
One of my favorite things about being a Stampin' Up! Demonstrator, is the opportunity to preorder new products from the upcoming January-June 2022 Mini Catalog a month early. It has been so much fun playing with these new products and coming up with new ideas ready for 2022 to share with all of you. Today's card design features the Love & Happiness Bundle and I paired it with the Amazing Silhouettes stamp set that I was lucky enough to get free during a recent Stampin' Up! event I attended. I wanted to create a monochromatic design featuring Pale Papaya, one of the new 2021-2023 In Colors in the 2021-2022 Annual Catalog. This soft and pretty color has a light and cheerful feel to it and I thought it would be perfect for a Spring card design. The Bouquet of Love Hybrid Embossing Folder creates a beautiful embossed background and I used one of the coordinating dies to die cut the focal heart shape. This card design uses simple techniques to create a simply Wow look that is suitable for a variety of occasions. 
Products Used:
Love & Happiness Bundle (item #157642) 
Amazing Silhouettes stamp set (item #157814)
Pale Papaya Cardstock (item #155668)
Basic White Cardstock (item #159276)
Pale Papaya Classic Ink Pad (item #155670)
Veramark Pad (item #102283)
Basics Embossing Powders (item #155554)
Stampin' Dimensionals
Blending Brushes (item #153611)
Champagne Rhinestone Basic Jewels (item #151193)
Measurements:
Pale Papaya Cardstock
Card Base - 8 1/2" x 5 1/2" (Scored at 4 1/4")
Card Front - 5" x 3 3/4" Embossed with the Bouquet of Love Hybrid Embossing Folder
Basic White Cardstock
Layer 1 - 5 1/4" x 4"
Focal Heart die cut with the Bouquet of Love Hybrid Embossing Folder (Dies)
Sentiment Label die cut with the Bouquet of Love Hybride Embossing Folder (Dies) 
This card design features two of my favorite techniques - heat embossing and dry embossing. To help the heat embossed butterfly image stand out, I sponged it with Pale Papaya Classic ink using one of the Blending Brushes to create an emboss resist, which helps the white embossed image stand out. The beautiful dry embossed background adds wonderful texture to the card design and I love the heart design it creates in the center. I used Stampin' Dimensionals to pop up the heart image on the card front to add dimension and I also used Stampin' Dimensionals to attach the Basic White layer to the card base. I love that the Champagne Rhinestones coordinate beautifully with the Pale Papaya cardstock and ink to add a touch of bling that finishes off the design. This pretty card design would work well for so many occasions and you could create a totally different look and feel just by changing the colors for your card. I hope that this card design will help you to see the wonderful possibilities that these new products have to offer. 
Thank you for taking the time to visit my blog. I hope that my card design will inspire you to create your own wonderful projects and help spark your creativity. There are so many wonderful new products coming soon in the January-June 2022 Mini Catalog for you to explore. 
Now it's time to visit Gez's wonderful blog and see what she has to share with us this month. Just click on the Next button to visit her blog or use the Roll Call List to find your way. We would love it if you would leave us a comment and let us know what you liked about projects. I hope you enjoy the rest of our blog hop. 


Roll Call
If you live in the U.S. and do not have a Stampin' Up! Demonstrator, please contact me and I would be  happy to help you with your creative projects. You may also visit my Online Store to place your order and have it shipped to you. 

Until Next Time

Happy Stamping,

Tricia Butts
Independent Stampin' Up! Demonstrator

Like What You See? Visit My Online Store Here

Visit My Facebook Business Page for Updates & Ideas

Click here to Contact Me


Stock Up On Your Favorite Retiring Products
From the July-December 2021 Mini Catalog
Click Below To Visit My Online Store