
Welcome to Kylie Bertucci's Monthly International Blog Highlights as we showcase Thank You cards to help you get started in the New Year. You will be visiting with talented Stampin' Up! Demonstrators from around the world as they share their ideas and projects to help spark your creativity to create your own wonderful projects.

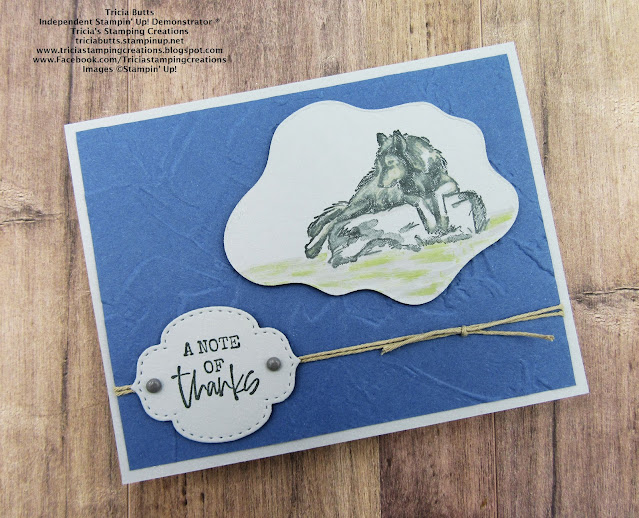
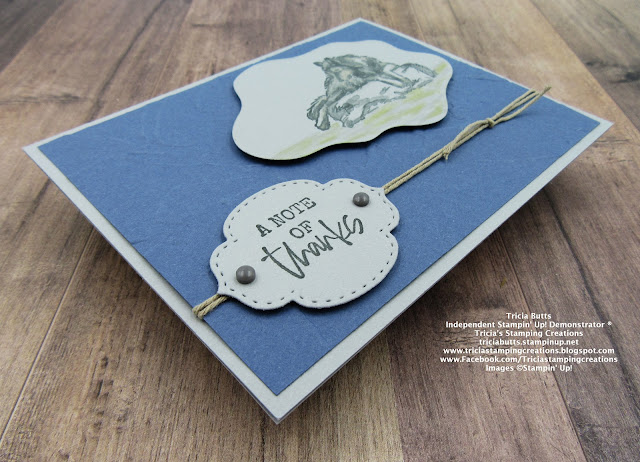
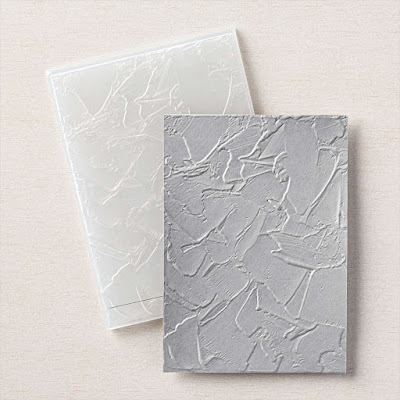
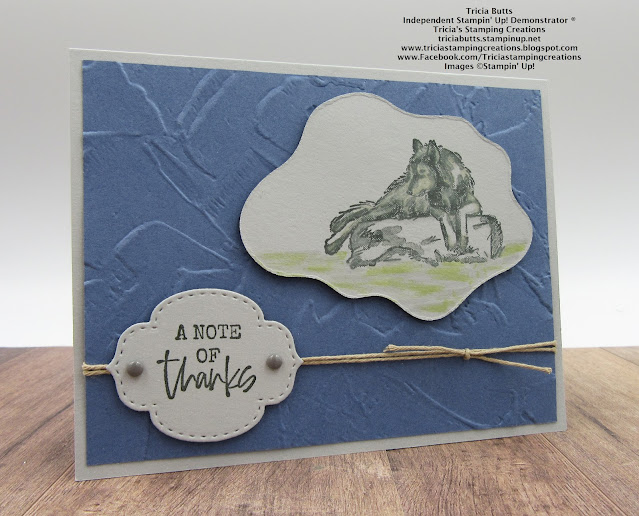
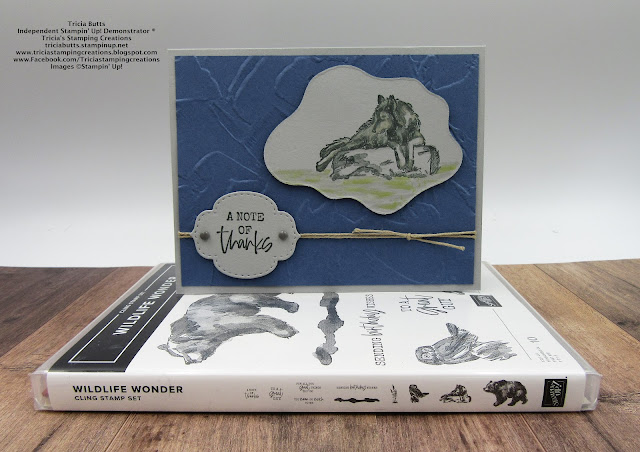
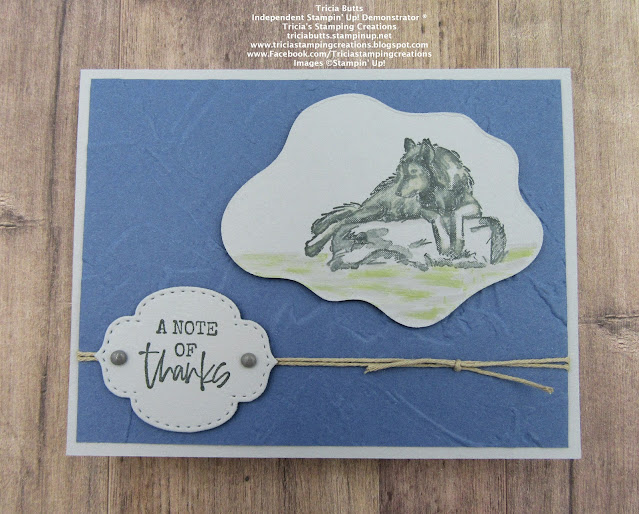
My Thank You card design features new products from the January-June 2022 Mini Catalog, which launches January 4th. I wanted to create a masculine Thank You card using the new Wildlife Wonder stamp set. I just love the beautiful images in this stamp set and the animals remind me of the wildlife we have here in Colorado. I paired the stamp set with the Layering Dioramas Dies and the Painted Textures 3D Embossing Folder. For this card design, I chose Misty Moonlight and Smoky Slate cardstock.
Products Used:
Wildlife Wonder stamp set (item #157923)
Layering Diorama Dies (item #155565)
Stitched So Sweetly Dies (item #151690)
Painted Texture 3D Embossing Folder (item #154317)
Misty Moonlight Cardstock (item #153081)
Smoky Slate Cardstock (item #131202)
Basic Gray Classic Ink Pad (item #149165)
Gray Granite Stampin' Blends Combo Pack (item #154886)
Crumb Cake Stampin' Blends Combo Pack (item #154882)
Old Olive Stampin' Blends Combo Pack (item #154892)
Color Lifter (item #144608)
Baker's Twine Essentials Pack (item #155475)
Classic Matte Dots (item #158146)
Measurements:
Smoky Slate Cardstock
Card Base - 8 1/2" x 5 1/2" (Scored at 4 1/4")
Focal image layer die cut with Layering Diorama Dies
Sentiment Label die cut with Stitched So Sweetly Dies
Misty Moonlight Cardstock
Card Front - 5 1/4" x 4" Embossed with the Painted Texture 3D Embossing Folder
Stampin' Dimensionals (item #104430)
This clean and simple card is easy to create with just a few simple supplies. The Painted Textures 3D Embossing Folder adds wonderful texture to the background that makes me think of the texture of rocks. I stamped the images with Basic Gray Classic ink and I used Stampin' Blends Markers to add a touch of color to the wolf and the foreground. I kept the embellishments nice and simple, using Crumb Cake Baker's Twine from the Baker's Twine Essentials Pack, wrapping it twice around the card front and tying on knot on the right side. I attached the sentiment label over the top of the twine with Stampin' Dimensionals and added the focal image towards the top right corner also using Stampin' Dimensionals. For the finishing touch, I added two of the Basic Gray Matte Dots from the Classic Matte Dots to embellish the sentiment label.
Thank you for taking the time to visit my blog. I hope that my card design will help inspire you to get creative and make your own beautiful Thank You cards. They are a wonderful way to show people how much we appreciate them.
I would love it if you would take a moment to vote for my card design as part of this month's Blog Highlights. Just click the Vote button below and click on the small heart on my card's thumb nail (#33). You have the opportunity to vote for 5 different cards each day over the next week, so please share the love with my fellow creative stampers and visit their blogs.

If you live in the U.S. and do not have a Stampin' Up! Demonstrator, please contact me and I would be happy to help you with your creative projects. You may also visit my Online Store to place your order and have it shipped to you.
Until Next
Time
Happy
Stamping,
Tricia Butts
Independent Stampin' Up!
Demonstrator
Like What You
See? Visit My Online Store Here
Visit My Facebook Business Page for Updates & Ideas
Click here to Contact Me
That wolf is so cool. It's on my wish list. Pretty card .
ReplyDeleteGreat image and colours for both a masuline or feminine card! Thanks Tricia for being part of my International Blog Highlights this month and all the best with voting!
ReplyDeleteGreat use of those dies for a frame Tricia 🙂
ReplyDelete