Friday, September 20, 2024

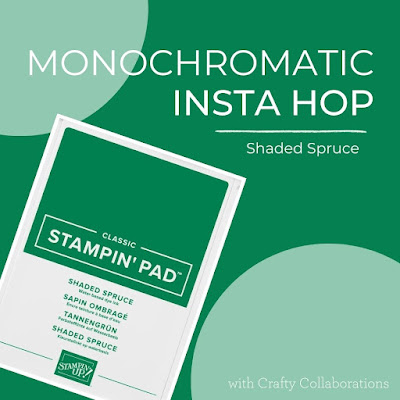
Crafty Collaborations Monochromatic Color Challenge Week 38 - Shaded Spruce


It's time for Week 39 of the Monochromatic Color Challenge. This week we are showcasing Shaded Spruce from the Regals Collection. This gorgeous dark green is so versatile and I love using it for the holidays. 
One of my favorite new embossing folders from the September-December 2024 Mini Catalog would have to be the Painted Trees 3D Embossing Folder. I love all the wonderful detail created by this embossing folder and I wanted to use it to create my background design for my card. The focal image has been created using the Greetings of the Season Bundle and I love how the Gold embossing pops against the Shaded Spruce label. Instead of using Basic White, I chose to use Soft Sea Foam to add contrast to my design. I love how these two greens look together to create this beautiful Christmas card.
Products Used:
Greetings of the Season Bundle (item #164113)
Painted Trees 3D Embossing Folder (item #164026)
Shaded Spruce Cardstock (item #146981)
Soft Sea Foam Cardstock (item #146988)
Versamark Pad (item #102283)
Metallics Wow Embossing Powders (item #165678)
Gold Textured Adhesive Backed Dots (item #164027)
Stampin' Dimensionals (item #104430)
Measurements:
Shaded Spruce Cardstock
Card Base - 5 1/2" x 8 1/2" (Scored at 4 1/4")
Card Front - 5" x 3 3/4" Embossed with the Painted Trees 3D Embossing Folder
Sentiment Label die cut with the Greetings of the Season Dies
Soft Sea Foam Cardstock
Layer 1 - 5 1/4" x 4"
Matte Label die cut with the Greetings of the Season Dies
This wonderful clean and simple holiday card is easy to create with just a few supplies. I started by embossing the card front using the Painted Trees 3D Embossing Folder to add texture to the design. I attached it to the Soft Sea Foam cardstock layer and then added it to the card base using Stampin' Dimensionals. I heat embossed the sentiment from the Greetings of the Season stamp set using Gold embossing powder onto the Shaded Spruce sentiment label. I then layered it onto a larger label die cut from Soft Sea Foam cardstock and attached it to the card front with Stampin' Dimensionals. To complete the card design, I added two of the Gold Textured Adhesive Backed Dots to the sentiment label for a touch of bling. 
Thank you for taking the time to visit my blog. I hope that my card design will help inspire you to explore using Shaded Spruce for your future projects. There are so many ways to add texture and detail to help step up your card designs. 
Please take the time to visit this week's Insta Hop to see the amazing projects showcasing Shaded Spruce. Just click here to get started. We would appreciate it if you would leave us a comment and let us know what you liked about our projects. Don't forget to check back next Friday to see what color we will be featuring in Week 39 of the Monochromatic Color Challenge. 

If you live in the U.S. and do not have a Stampin' Up! Demonstrator, please contact me and I would be happy to help you with your creative projects. You may also visit my Online Store to place your order and have it shipped to you. 

Until Next Time

Happy Stamping,

Tricia Butts
Independent Stampin' Up! Demonstrator

Like What You See? Visit My Online Store Here

Visit My Facebook Business Page for Updates & Ideas

Click here to Contact Me


Check Out The Amazing New Products
In The September-December 2024 Mini Catalog
Click Below To Shop Now


Wednesday, September 18, 2024

New At SU September Blog Hop Christmas Friends Bundle

Welcome to the New At SU September Blog Hop as we showcase bundles from the new September-December 2024 Mini Catalog. Our Design Team is excited to share their projects and ideas to help inspire you to get creative for the holidays and beyond with these amazing new products. 
One of my favorite things to do at this time of the year is to create Christmas cards. There is something about the cooler weather of Fall that puts me in a festive mood. For today's card, I chose to use the new Christmas Friends Bundle paired with the Sentimental Christmas Designer Series Paper to create this beary sweet Christmas card. I chose to use Pretty Peacock cardstock for the card base and background circle to help make the designer series card front pop. I added some texture to the background circle with the new Painted Trees 3D Embossing Folder to help step up the design. This clean and simple Christmas card is so cute and really helped me to get into the spirit of the holiday season.
Products Used:
Christmas Friends Bundle (item #164088)
Sentimental Christmas Designer Series Paper (item #164209)
Deckled Circles Dies (item #162286)
Stylish Shapes Dies (item #159183)
Painted Trees 3D Embossing Folder (item #164026)
Pretty Peacock Cardstock (item #150880)
Basic White Cardstock (item #159276)
Pretty Peacock Classic Ink Pad (item #150083)
Memento Tuxedo Black Pad (item #132708)
Poppy Parade Stampin' Blends Combo Pack (item #154958)
Pecan Pie Stampin' Blends Combo Pack (item #161674)
Old Olive Stampin' Blends Combo Pack (item #154892)
Clear Wink of Stella Glitter Brush (item #141897)
Iridescent Pearls Basic Jewels (item #158987)
Stampin' Dimensionals (item #104430)
Measurements:
Pretty Peacock Cardstock 
Card Base - 5 1/2" x 8 1/2" (Scored at 4 1/4")
Medium Circle die cut with the Deckled Circles Dies
Basic White Cardstock
Bear image stamped and die cut with the Christmas Friends Bundle
Sentiment Label die cut with the Stylish Shapes Dies
Sentimental Christmas Designer Series Paper
Card Front - 5 1/4" x 4"
The Christmas Friends Bundle is one of my favorites from the new mini catalog and I couldn't wait to create a card design with it. I love how the Sentimental Christmas Designer Paper provides the perfect background for the sweet bear image. To add a little shimmer to the card design, I added some Clear Wink of Stella to the embossed trees to help them stand out. I colored the bear image with an assortment of Stampin' Blends Markers to help bring him to life. For the sentiment label, I stamped the image with Pretty Peacock Classic ink and die cut the sentiment with the Stylish Shapes Dies. To complete the card design, I colored two of the small Iridescent Pearls with the Dark Poppy Parade Stampin' Blends Marker and added them to the sentiment label for a touch of bling. 
Thank you for taking the time to visit my blog. I hope that my card design will help inspire you to check out the amazing new products in the September-December 2024 Mini Catalog. Did you know that when you order the Sentimental Christmas Designer Series Paper, Stampin' Up! will donate $3 for each pack sold to benefit children's literacy as part of the Making A Difference Product Giveback? It's a wonderful way to help make a difference in the lives of others. 
Please take the time to visit our wonderful Design Team and their beautiful projects by using the Roll Call List below. We would love it if you would leave us a comment and let us know what you liked about our projects. 

If you live in the U.S. and do not have a Stampin' Up! Demonstrator, please contact me and I would be happy to help you with your creative projects. You may also visit my Online Store to place your order and have it shipped to you. 

Until Next Time

Happy Stamping,

Tricia Butts
Independent Stampin' Up! Demonstrator

Like What You See? Visit My Online Store Here

Visit My Facebook Business Page for Updates & Ideas

Click here to Contact Me


Check Out The Amazing New Products
In The September-December 2024 Mini Catalog
Click Below To Shop Now


Friday, September 13, 2024

Crafty Collaborations Monochromatic Color Challenge Week 37 - Crushed Curry

Happy Friday everyone. This week we are showcasing Crushed Curry from the Regals Collection for Week 37 of the Monochromatic Color Challenge. This gorgeous yellow is perfect for Fall, so I thought I would create a beautiful clean and simple card design to celebrate the new season.
For today's design, I chose to use the new Autumn Expressions Bundle, one of my new favorites from the September-December 2024 Mini Catalog. I paired it with the Leaf Fall 3D Embossing Folder to add some subtle texture to the background layer. This card design is all about Crushed Curry with just a touch of Gold Foil to help step up the design. 
Products Used:
Autumn Expressions Bundle (item #164056)
Leaf Fall 3D Embossing Folder (item #159847)
Crushed Curry Cardstock (item #115319)
Basic White Cardstock (item #159276)
Gold Foil Sheets (item #132622)
Crushed Curry Classic Ink Pad (item #147087)
Stampin' Dimensionals (item #104430)
Blender Pens (item #102845)
Measurements:
Crushed Curry Cardstock
Card Base - 5 1/2" x 8 1/2" (Scored at 4 1/4")
Card Front - 5 1/4" x 4" Embossed with the Leaf Fall Embossing Folder
Basic White Cardstock
Sentiment Label stamped & die cut with the Autumn Expressions Bundle
2 Leaves stamped & die cut with the Autumn Expressions Bundle
Gold Foil Sheets
Detailed Leaves die cut with the Autumn Expressions Dies
This beautiful clean and simple card design showcases the versatility of this wonderful yellow. I love the tone on tone design created with the Leaf Fall 3D Embossing Folder which adds subtle texture to the background. I stamped the two leaves using Crushed Curry Classic ink onto Basic White cardstock and used a Blender Pen to blend the ink to add soft color to the leaves. I die cut them out using the coordinating dies as well as the detailed leaves from a piece of Gold Foil. For the sentiment, I stamped the image with Crushed Curry Classic ink onto the Basic White label. I love the contrast between the Crushed Curry card front and the Basic White sentiment label to help bring this design to life. This card design would work well for a variety of occasions including Thanksgiving. 
Thank you for taking the time to visit my blog. I hope that my card design will help inspire you to explore using Crushed Curry in your future projects, especially for Fall. There are so many wonderful possibilities for you to try.
Please take the time to visit this week's Monochromatic Insta Hop to see all the amazing projects showcasing Crushed Curry. Just click here to get started. We would love it if you would leave us a comment and let us know what you liked about our projects. 

If you live in the U.S. and do not have a Stampin' Up! Demonstrator, please contact me and I would be happy to help you with your creative projects. You may also visit my Online Store to place your order and have it shipped to you. 

Until Next Time

Happy Stamping,

Tricia Butts
Independent Stampin' Up! Demonstrator

Like What You See? Visit My Online Store Here

Visit My Facebook Business Page for Updates & Ideas

Click here to Contact Me


Check Out The Amazing New Products
In The September-December 2024 Mini Catalog
Click Below To Shop Now


Wednesday, September 11, 2024

ICS September Blog Hop Fall Fun


It's time to hop along with the ICS September Blog Hop as we celebrate Fall Fun. Our Design Team will be sharing their projects and ideas to help you get in the mood for this fun season. There is so much to love about Fall and there are some amazing new products to explore in the September-December 2024 Mini Catalog to help spark your creativity.
I have fallen in love with the new Splendid Autumn 6"x 6" Designer Series Paper and all the beautiful designs that help celebrate this wonderful time of the year. They are perfect for creating lovely clean and simple card designs for all occasions and are easy to create with just a few supplies. For today's card, I chose to use sentiments from the new More Than Autumn stamp set. Both of these products can be found in the new mini catalog and will open the door to new possibilities. 
Products Used:
More Thank Autumn stamp set (item #164228)
Deckled Circles Dies (item #162286)
Splendid Autumn 6"x6" Designer Series Paper (item #164173)
Thick Basic White Cardstock (item #159229)
Basic White Cardstock (item #159276)
Versamark Pad (item #102283)
Metallics Wow Embossing Powders (item #165678)
Linen Thread (item #104199)
Stampin' Dimensionals (item #104430)
Measurements:
Thick Basic White Cardstock 
Card Base - 5 1/2" x 8 1/2" (Scored at 4 1/4")
Basic White Cardstock
Small Circle die cut with the Deckled Circles Dies
Splendid Autumn Designer Series Paper
Card Front - 5 1/4" x 4"
This beautiful clean and simple card design is perfect for sending to someone just to let them know you are thinking of them. I started with Thick Basic White cardstock for the card base and added one of the beautiful designs as my card front to be the focus of my card. For the sentiment, I chose the sentiments from the More Than Autumn stamp set and heat embossed them with Gold embossing powder onto a Basic White circle die cut with the Deckled Circles Dies. I added the sentiment to the bottom left corner with Stampin' Dimensionals to pop it up. For the finishing touch, I added a simple Linen Thread bow. I love the simplicity of this card design and I think it would be fun to create a stash of cards with the designs in this paper pack to have on hand for all occasions. 
Thank you for taking the time to visit my blog. I hope that my clean and simple Fall card will help inspire you to explore creating your own beautiful projects for the upcoming season. There are so many wonderful options to explore.
Please visit the other Design Team members to see their amazing projects showcasing Fall by clicking on the links in the Roll Call List below. We would appreciate it if you would leave us a comment and let us know what you liked about our projects.

If you live in the U.S. and do not have a Stampin' Up! Demonstrator, please contact me and I would be happy to help you with your creative projects. You may also visit my Online Store to place your order and have it shipped to you. 

Until Next Time

Happy Stamping,

Tricia Butts
Independent Stampin' Up! Demonstrator

Like What You See? Visit My Online Store Here

Visit My Facebook Business Page for Updates & Ideas

Click here to Contact Me


Check Out The Amazing New Products
In The September-December 2024 Mini Catalog
Click Below To Shop Now


Around The World On Wednesday September Blog Hop The Way We Were

Welcome to the Around the World On Wednesday September Blog Hop with our theme this month, "The Way We Were". Our Design Team will be sharing their projects and ideas to help spark your creativity as we explore this fun theme.
When I saw this month's theme, it made me think of nostalgia and reminiscing about fun memories. With the new Mix & Match Ephemera Packs in the September-December 2024 Mini Catalog, I thought it would be fun to create a clean and simple Christmas card that reminds me of the old fashioned designs that I remember from years past. The Joyful Images Mix & Match Ephemera Pack and Joyful Sayings Mix & Match Ephemera Pack are filled with old style holiday images and beautiful sentiments that make creating your own unique Christmas cards fun. I used one of the Gold Dipped Cards & Envelopes for my card base to give my card the feeling of a Winter scene.
Products Used:
Joyful Images Mix & Match Ephemera Pack (item #164110)
Joyful Sayings Mix & Match Ephemera Pack (item #164109)
Gold Dipped Cards & Envelopes (item #164108)
Stampin' Dimensionals (item #104430)
Basic Rhinestone Jewels (item #144220)
Measurements:
Gold Dipped Cards & Envelopes 
Night of Navy Card Base
Joyful Images Ephemera Pack
Trees & Reindeer die cuts
Joyful Sayings Ephemera Pack
Sentiment die cut
The Mix & Match Ephemera Packs are filled with a variety of images and sayings to give you so many choices to create your card designs. They pair beautifully with the Gold Dipped Cards & Envelopes to help you create clean and simple cards for the holidays. Did you know that on pages 16-17 of the new September-December 2024 Mini Catalog, there are sketches to help you put together your own cards and tags? All you have to do is choose which images and sayings you want to use to decorate your cards and tags. Whether you choose to create a classically elegant design like the one I created, or something more fun and nostalgic, the possibilities are endless. The best part? No stamping required, so no inky fingers. This would be a fun project to do with your family to get ready for the holidays.
Thank you for taking the time to visit my blog. I hope that my card design will help inspire you to create your own beautiful projects with the new Mix & Match Ephemera Packs. Whether you are looking to create holiday cards, tags or scrapbook pages, there is something for everyone. 
Now it's time to visit Theresa's blog and see what she has to share with us. Just click on the Next button below to visit her blog or use the Roll Call List to find your way. We would love it if you would leave us a comment and let us know what you liked about our projects. I hope you enjoy the rest of our blog hop. 

Roll Call List

If you live in the U.S. and do not have a Stampin' Up! Demonstrator, please contact me and I would be happy to help you with your creative projects. You may also visit my Online Store to place your order and have it shipped to you. 

Until Next Time

Happy Stamping,

Tricia Butts
Independent Stampin' Up! Demonstrator

Like What You See? Visit My Online Store Here

Visit My Facebook Business Page for Updates & Ideas

Click here to Contact Me