Monday, January 31, 2022

Kylie Bertucci's Monthly International Blog Highlights February

Welcome to Kylie Bertucci's February Monthly International Blog Highlights as we showcase Thank You cards to help inspire you. You will have the opportunity to visit with talented Stampin' Up! Demonstrators from around the world as they share their projects and ideas to spark your creativity. 
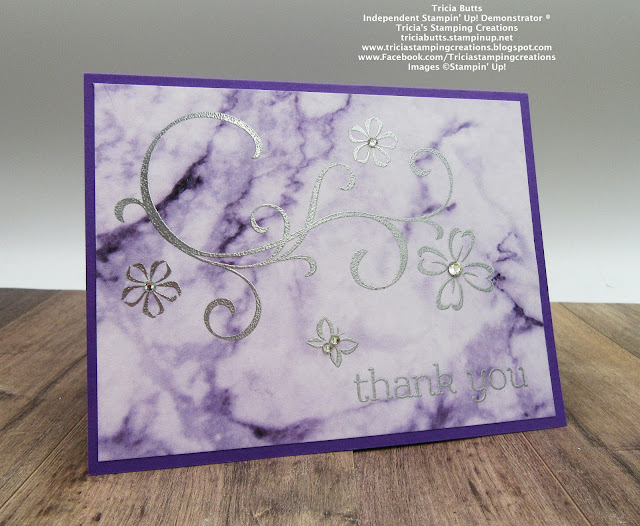
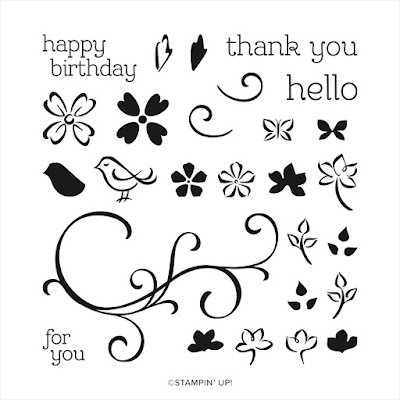
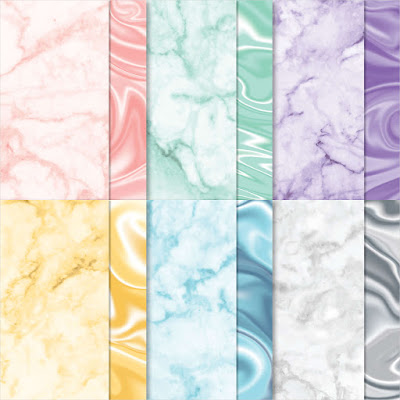
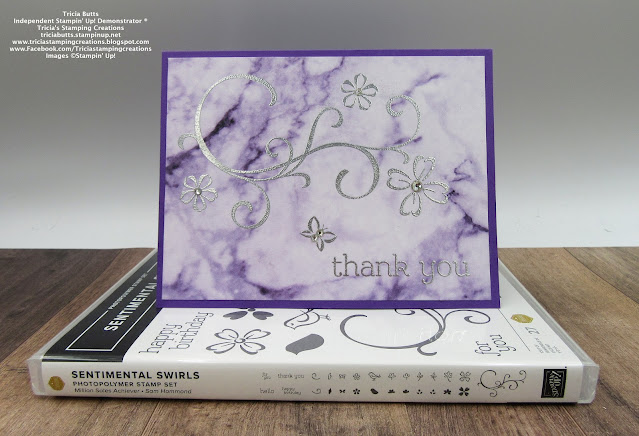
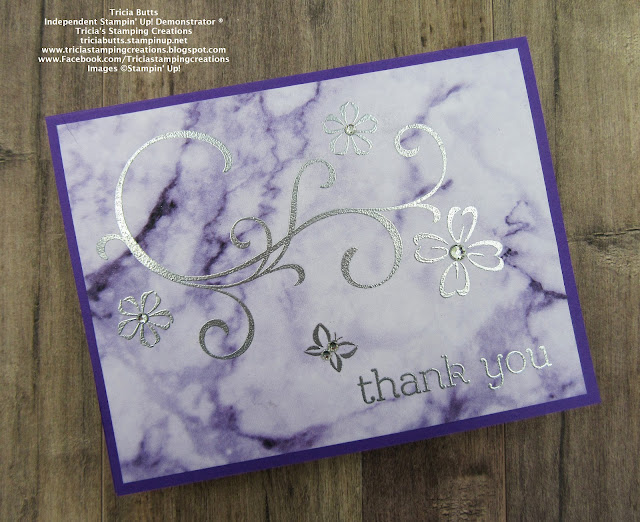
Clean and simple cards are my favorite to create and I the new Sentimental Swirls stamp set from the January-June 2022 Mini Catalog, is perfect for this style of card. I paired it with the pretty Simply Marbleous 6"x6" Designer Series Paper, which is one of the Sale-a-bration Rewards you can earn free with a qualifying $50 order. To create the design, I embossed the images and sentiment with Silver embossing powder onto the designer series paper. It creates a simply elegant design that is perfect for this Thank You card. This design would work beautifully with any of the colors in this designer series paper pack to create a wonderful set of cards.
Products Used:
Sentimental Swirls stamp set (item #157996)
Simply Marbleous 6"x6" Designer Series Paper (item #158128)
Gorgeous Grape Cardstock (item #146987)
Versamark Pad (item #102283)
Metallics Embossing Powders (item #155555)
Rhinestone Basic Jewels (item #144220)
Measurements:
Gorgeous Grape Cardstock
Card Base - 8 1/2" x 5 1/2"
Simply Marbleous Designer Series Paper
Card Front - 5 1/4" x 4"
This clean and simple card design is a wonderful way to showcase this beautiful stamp set which has so many wonderful elements to create cards for all occasions. I love how you can mix and match the different images to create simply elegant designs. Heat embossing on designer series paper is such a fun technique and I love how this design turned out. The Basic Rhinestone Jewels add a touch of bling to finish off the design. 
Thank you for taking the time to visit my blog. I hope that my card design will help inspire you to create your own beautiful Thank You cards to send to family and friends. It is a wonderful way to show how much you appreciate them.
I would love it if you would take the time to vote for my card design this month. Just click the Vote button below and click on the small heart for my card (#36). You can vote for 5 cards each day over the next week, so please share the love and vote for my fellow demonstrators and their wonderful projects.


If you live in the U.S. and do not have a Stampin' Up! Demonstrator, please contact me and I would be happy to help you with your creative projects. You may also visit my Online Store to place your order and have it shipped to you. 

Until Next Time

Happy Stamping,

Tricia Butts
Independent Stampin' Up! Demonstrator

Like What You See? Visit My Online Store Here

Visit My Facebook Business Page for Updates & Ideas

Click here to Contact Me


Explore Your Creativity
With The January-June 2022 Mini Catalog
Click Below To Visit My Online Store

Earn Free Exclusive Products
During Sale-a-bration
Click Below For More Details


Saturday, January 22, 2022

Stamping With Friends Valentine's Blog Hop

 
Welcome to the Stamping With Friends Valentine's Blog Hop as we share fun and creative ideas and projects to help inspire you. You will be visiting with our talented Design Team as they showcase Stampin' Up! products to help spark your creativity. 
For my Valentine's card, I chose to use the beautiful Love & Happiness Bundle from the January-June 2022 Mini Catalog. I love the pretty embossing and coordinating dies in the Bouquet of Love Hybrid Embossing Folder and the Love & Happiness stamp set has a wonderful assortment of beautiful sentiments for a variety of occasions. 
Products Used:
Love & Happiness Bundle (item #157642)
Blushing Bride Cardstock (item #131198z)
Basic White Cardstock (item #159276)
Versamark Pad (item #102283)
Metallics Embossing Powders (item #155555)
Clear Wink of Stella Glitter Brush (item #141897)
Iridescent Rhinestone Basic Jewels (item #158130)
Stampin' Seal Adhesive (item #152813)
Measurements:
Blushing Bride Cardstock
Card Base - 8 1/2" x 5 1/2"
Heart Layer - 5 1/4" x 4" embossed and die cut with the Bouquet of Love Hybrid Embossing Folder (item #157641)
Basic White Cardstock
Card Front -5 1/4" x 4" embossed and die cut with the Bouquet of Love Hybrid Embossing Folder (item #157641)
Sentiment Label die cut with the Bouquet of Love Hybride Embossing Folder (Dies)
This clean and simple card design is easy to create and the combination of the embossed background and Gold embossing for the sentiment give it an elegant, romantic look. To create the card front, I embossed and die cut the Basic White cardstock layer with the Bouquet of Love Hybrid Embossing Folder to create the opening in the center. I repeated the same with the Blushing Bride cardstock layer so that the heart would fit inside the Basic White card front layer. Note: you can create a second card using the Blushing Bride cardstock layer as the card front and the Basic White embossed heart for the focal image. Using Clear Wink of Stella, I colored the raised embossed areas of the Blushing Bride Heart to add shimmer. I attached the card front and heart to the Blushing Bride card base with Stampin' Seal Adhesive so that they lay flat against the card base. I heat embossed the sentiment from the Love & Happiness stamp set with Gold embossing powder onto the sentiment label and attached it to the center of embossed heart with Stampin' Dimensionals. To finish off the design, I added Iridescent Rhinestone Basic Jewels to the card front and sentiment label for a touch of bling. It is a very simple card to create but has wonderful detail to give it that Wow factor. 
Thank you for taking the time to visit my blog. I hope that my card design will help inspire you to create your own wonderful Valentine's Day projects to give to family and friends.
Now it's time to visit Rachael's blog and see what she has to share with us. Just click on the Next button to visit her blog or use the Roll Call List below to find your way. Please leave us a comment and let us know what your favorite thing is about our projects. I hope you enjoy the rest of our blog hop. 


If you live in the U.S. and do not have a Stampin' Up! Demonstrator, please contact me and I would be happy to help you with your creative projects. You may also visit my Online Store to place your order and have it shipped to you.

Until Next Time

Happy Stamping,

Tricia Butts
Independent Stampin' Up! Demonstrator

Like What You See? Visit My Online Store Here

Visit My Facebook Business Page for Updates & Ideas

Click here to Contact Me


Explore Your Creativity

With The January-June 2022 Mini Catalog

Click Below To Visit My Online Store


Earn Exclusive Free Products
During Sale-a-bration
Click Below For More Details


Ink. Stamp. Share. January Monthly Blog Hop Pick A Suite

Welcome to the Ink. Stamp. Share. Monthly Blog Hop and we are starting off the New Year showcasing the wonderful product suites that Stampin' Up! has to offer. Our Design Team members will be sharing their amazing projects and ideas to help inspire you to get creative.
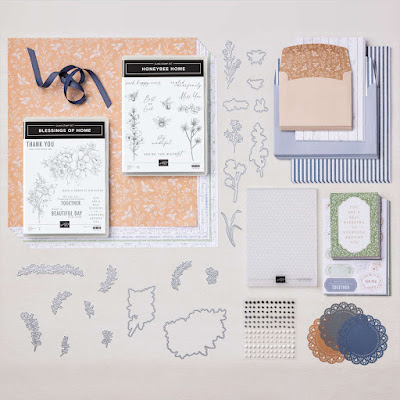
The suite I chose to for today's card is the beautiful Heart & Home Suite Collection from the January-June 2022 Mini Catalog. This is in fact a mega suite with two separate bundles along with coordinating products to help you create wonderful projects. For my card design, I chose to focus on the Blessings of Home stamp set and paired it with the pretty Heart & Home Designer Series Paper. I just love the soft, romantic feel of the designs in both the stamp set and paper pack and used them to create a beautiful Thank You card. 
Products Used:
Heart & Home Suite Collection (item #157959)
- Blessings of Home stamp set (item #157930)
- Heart & Home Designer Series Paper (item #157928)
- Classic Matte Dots (item #158146)
Tasteful Labels Dies (item #152886)
Fresh Freesia Cardstock (item #155613)
Versamark Pad (item #102283)
Basics Embossing Powders (item #155554)
2021-2023 In Color Jewels (item #155571)
Stampin' Dimensionals (item #104430)
Measurements:
Fresh Freesia Cardstock
Card Base - 8 1/2" x 5 1/2" (Scored at 4 1/4")
Focal Label die cut with Tasteful Labels Dies
Sentiment Label die cut with Tasteful Labels Dies
Heart & Home Designer Series Paper
Card Front - 5 1/4" x 5"
This beautiful clean and simple card is easy to create. The designer series paper is the star of the card design and I heat embossed the floral image and sentiment with White embossing powder onto the Fresh Freesia die cuts created with the Tasteful Labels Dies. This monochromatic card is a wonderful design that can be used for a variety of occasions. I added just a touch of bling on the floral label using the 2021-2023 In Color Jewels and two of the White Classic Matte Dots to embellish the sentiment label, to complete the card design. 
Thank you for taking the time to visit my blog. I hope that my card design will help inspire you to get creative using the amazing suites that Stampin' Up! has to offer. It's a great way to have everything you need to create your project with the coordinating products to make it a stress-free experience.

Now it's time to visit Jill's wonderful blog and see which suite she has chosen to showcase. Just click the Next button to visit her blog or use the Roll Call List to find your way. I hope you will leave us a comment and let us know what you liked about our projects. Enjoy the rest of our blog hop. 

Roll Call
If you live in the U.S. and do not have a Stampin' Up! Demonstrator, please contact me and I would be happy to help you with your creative projects. You may also visit my Online Store to place your order and have it shipped to you. 

Until Next Time

Happy Stamping,

Tricia Butts
Independent Stampin' Up! Demonstrator

Like What You See? Visit My Online Store Here

Visit My Facebook Business Page for Updates & Ideas

Click here to Contact Me


Explore Your Creativity
With The January-June 2022 Mini Catalog
Click Below To Visit My Online Store

Earn Free Exclusive Products
During Sale-a-bration
Click Below For More Details


Wednesday, January 19, 2022

New At SU January Blog Hop Driving By

Welcome to the New At SU January Blog Hop and we are starting off the New Year by celebrating Sale-a-bration. Our Design Team will be sharing projects and ideas using Sale-a-bration products to help inspire you to get creative with these amazing new products.
To showcase the amazing new products in the 2022 Sale-a-bration Catalog, I chose to use the new Driving By stamp set and the Sunshine & Rainbows 6"x6" Designer Series Paper to create my card design. Both of these products are Level 1 Sale-a-bration Rewards and they can each be earned Free with a qualifying $50 order. This clean and simple card design requires just a few additional basic supplies to help create a fun, cheerful card for a variety of occasions.
Products Used:
Driving By stamp set (item #158099) Level 1 Sale-a-bration Reward
Sunshine & Rainbows 6"x6" Designer Series Paper (item #158126)
Level 1 Sale-a-bration Reward
Layering Circles Dies (item #151770)
Stitched Rectangles Dies (item #151820)
Flirty Flamingo Cardstock (item #141416)
Pool Party Cardstock (item #122924)
Basic White Cardstock (item #159276)
Flirty Flamingo Classic Ink Pad (item #147052)
Memento Tuxedo Black Pad (item #132708)
Flirty Flamingo Stampin' Blends Combo Pack (item #154884)
Pool Party Stampin' Blends Combo Pack (item #154894)
So Saffron Stampin' Blends Combo Pack (item #154905)
Smoky Slate Stampin' Blends Combo Pack (item #154904)
Iridescent Rhinestones Basic Jewels (item #158130)
Stampin' Dimensionals (item #104430)
Measurements:
Flirty Flamingo Cardstock
Card Base - 8 1/2" x 5 1/2" (Scored at 4 1/4")
Pool Party Cardstock 
Large Circle die cut with Layering Circles Dies
Basic White Cardstock
Focal Circle die cut with Layering Circles Dies
Sentiment Label die cut with Stitched Rectangles Dies
This clean and simple card focuses on the colors in the designer series paper. I chose Pool Party, Flirty Flamingo and So Saffron Stampin' Blends Markers to color the stamped car image from the Driving By stamp set. I added Smoky Slate Stampin' Blends Markers to color the tires as an additional color. The sentiment was stamped with Flirty Flamingo Classic ink. I added a Basic White layer to frame the designer series paper to make it pop against the Flirty Flamingo card base and the Pool Party circle helps the focal image stand out against the background. For a touch of bling, I added Iridescent Rhinestones Basic Jewels to finish off the card design. 
Now it's time to visit Heather's blog and see what she has to share with us. Just click on the Next button to visit her blog or use the Roll Call List below to find your way. We would appreciate it if you would leave us a comment and let us know what you liked about our projects. I hope you enjoy the rest of our blog hop.


Roll Call List
Thank you for taking the time to visit my blog. I hope that my card design will help inspire you to create your own wonderful projects using the amazing new products available during Sale-a-bration. Remember you can earn these products free with a qualifying order during Sale-a-bration, which ends February 28th. 
If you live in the U.S. and do not have a Stampin' Up! Demonstrator, please contact me and I would be happy to help you with your creative projects. You may also visit my Online Store to place your order and have it shipped to you. 

Until Next Time

Happy Stamping,

Tricia Butts
Independent Stampin' Up! Demonstrator

Like What You See? Visit My Online Store Here

Visit My Facebook Business Page for Updates & Ideas

Click here to Contact Me


Explore Your Creativity
With The January-June 2022 Mini Catalog
Click Below To Visit My Online Store

Earn Free Exclusive Products
During Sale-a-bration
Click Below For More Details


Sunday, January 16, 2022

Kre8tors January Blog Hop Free For All

 
It's time to welcome back the Kre8tors Blog hop after taking a break over the past year. The Design Team is eager to share their current projects with you all and to start us off, our theme this month is "Free For All". This is a great opportunity for us to share with you what we love to help inspire you to get creative for the New Year.
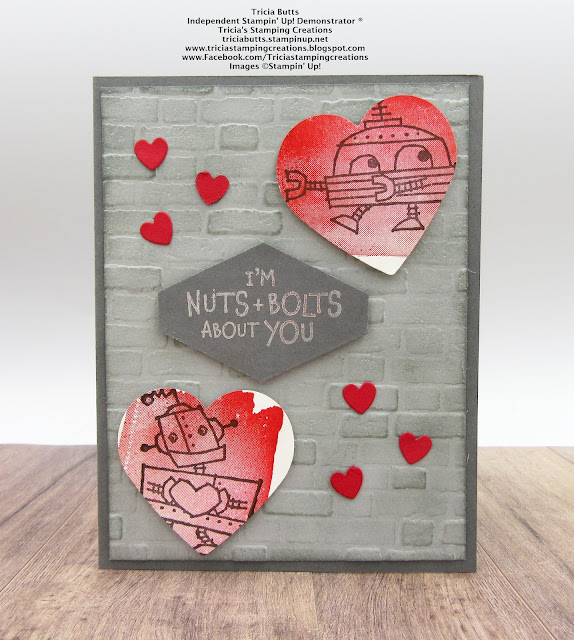
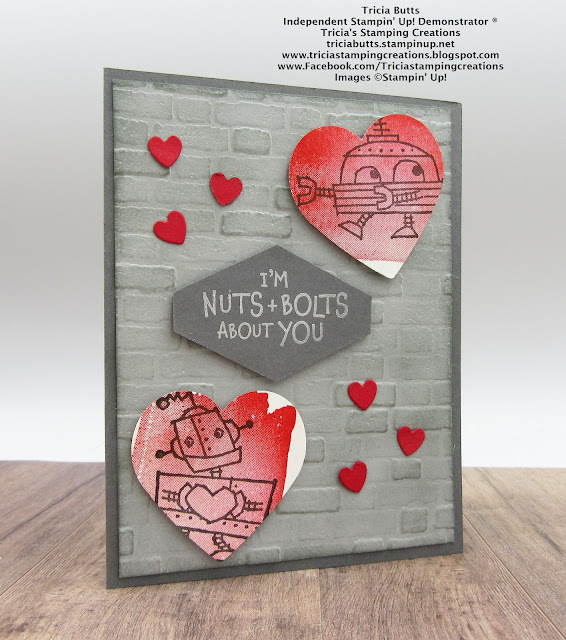
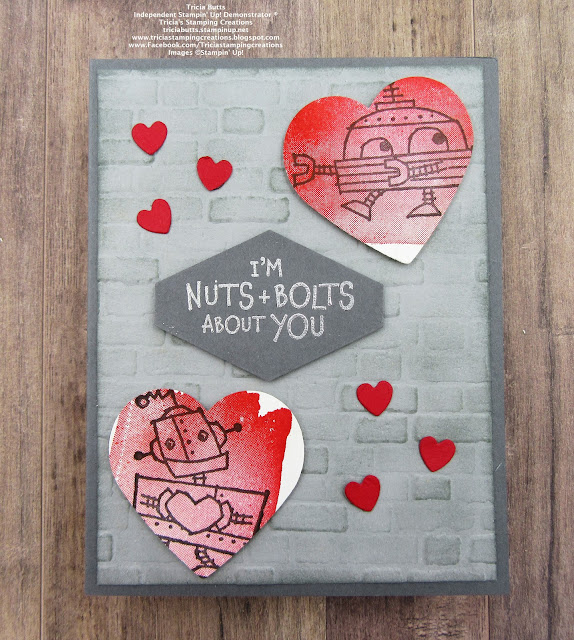
For my card design today, I have created a fun Valentine's card using the Nuts & Bolts stamp set. I just love these adorable robots and I think they are perfect for masculine cards. I paired it with the Brick & Mortar 3D Embossing Folder to add texture to the background. This fun card design would work well for a birthday card or an anniversary card.
Products Used:
Nuts & Bolts stamp set (item #157650)
Oceanfront stamp set (item #157862)
Sweet Hearts Dies (item #157623)
Brick & Mortar 3D Embossing Folder (item #149643)
Heart Punch Pack (item #151292)
Tailored Tag Punch (item #145667)
Basic Gray Cardstock (item #121044)
Smoky Slate Cardstock (item #131202)
Real Red Cardstock (item #102482)
Basic White Cardstock (item #159276)
Smoky Slate Classic Ink Pad (item #147113)
Poppy Parade Classic Ink Pad (item #147050)
Memento Tuxedo Black Pad (item #132708)
Versamark Pad (item #102283)
Metallics Embossing Powders (item #155555)
Sponge Daubers (item #133773)
Stampin' Dimensionals (item #104430)
Measurements:
Basic Gray Cardstock
Card Base - 8 1/2" x 5 1/2" (Scored at 4 1/4")
Sentiment Label punched out with the Tailored Tag Punch
Smoky Slate Cardstock
Card Front - 5 1/4" x 4" Embossed with the Brick & Mortar 3D Embossing Folder
Basic White Cardstock
Two Hearts punched out with the plain heart from the Heart Punch Pack
Real Red Cardstock
6 small hearts die cut with the Sweet Hearts Dies 
This cute card is simple to create with just a few easy steps. The embossed Smoky Slate adds texture to the background and I sponged it with Smoky Slate Classic ink using a Sponge Dauber to add a distressed look. I stamped the robot images with Memento Tuxedo Black ink onto Basic White cardstock and then stamped over the images with the rectangle background image from the Oceanfront stamp set. I punched each robot out with the plain heart punch to create the focal images. For the sentiment, I heat embossed the image with Silver embossing powder onto the Basic Gray label I punched out using the Tailored Tag Punch. I attached the sentiment to the center of the embossed card front with Stampin' Dimensionals and then added the hearts to the bottom left and top right corners, also with Stampin' Dimensionals. to finish off the card design, I added six of the small Real Red cardstock hearts in groups of three to embellish the card. 
Thank you for taking the time to visit my blog. I hope that my card design will help inspire you to create your own wonderful cards and projects to give to family and friends. It's amazing the difference a handmade gift can make in someone's life. 
Now it's time to visit Jacqui's blog and see what she has created to share with us. Just click the Next button to visit her blog or use the Roll Call List to find your way. We would love it if you would leave us a comment and let us know what you liked about our projects. I hope you enjoy the rest of our blog hop. 

Roll Call List

If you live in the U.S. and do not have a Stampin' Up! Demonstrator, please contact me and I would be happy to help you with your creative projects. You may also visit my Online Store to place your order and have it shipped to you. 

Until Next Time

Happy Stamping,

Tricia Butts
Independent Stampin' Up! Demonstrator

Like What You See? Visit My Online Store Here

Visit My Facebook Business Page for Updates & Ideas

Click here to Contact Me


Explore Your Creativity

With The January-June 2022 Mini Catalog

Click Below To Visit My Online Store


Earn Amazing Free Products

During Sale-a-bration

Click Below For More Details