Tuesday, September 29, 2020

PPP September Blog Hop Hello Pumpkin

Welcome to the Paper Pumpkin Possibilities October Blog Hop as we share alternative project ideas using the Hello Pumpkin Kit. You will be visiting with talented Stampin' Up! Demonstrators as they share their creative alternative project ideas for this month's kit. I hope that we inspire you to explore different ways to think outside of the box with your own kit. 
The September Paper Pumpkin kit is full of wonderful die cuts and supplies to help you create 20 cracker box treat holders that you can decorate for Fall, Halloween, Thanksgiving or a combination of all three. The abundance of supplies means that there are a wonderful variety of alternative projects that you can create just by using a little imagination and creativity. 
I love Halloween, so I couldn't wait to create a spooky card design with some of the supplies in this kit. The black cat and pumpkin die cuts are perfect for this season and were the starting point for my design. We have two black cats in our family, so I couldn't wait to create this design. I chose to use Bumblebee cardstock for my card base and added a layer of Night of Navy cardstock for the night sky. The brick wall was created using Gray Granite cardstock and the Brick & Mortar 3D Embossing Folder (item #149643) and I sponged it with Gray Granite Classic ink and a Sponge Dauber to give the bricks a worn, aged look. The moon has been sponged with Bumblebee Classic ink with a Sponge Dauber to add dimension. 
Supplies Used:
Paper Pumpkin Hello Pumpkin kit (September 2020)
Bumblebee cardstock (item #153077)
Night of Navy cardstock (item #100867)
Gray Granite cardstock (item #146983)
Brick & Mortar 3D Embossing Folder (item #149643)
Layering Circles Dies (item #151770)
Bumblebee Classic ink pad (item #153116)
Gray Granite Classic ink pad (item #147118)
Pumpkin Pie Classic ink pad (item #147086)
Sponge Daubers (item #133773)
Basic Rhinestone Jewels (item #144220)
Dark Granny Apple Green Stampin' Blends Marker (Combo - item #154885)
Measurements:
Bumblebee cardstock card base -  8 1/2" x 5 1/2" (scored at 4 1/4")
Night of Navy cardstock layer - 5 1/4" x 4"
Gray Granite pieces - 
2 1/4" x 4" (embossed with the Brick & Mortar 3D Embossing Folder)
1/2" x 4" strip
Bumblebee cardstock for the die cut circle for the moon
This card is simple to assemble using Stampin' Seal and Stampin' Dimensionals. I used the Dark Granny Apple Green Stampin' Blends Marker to color a medium Basic Rhinestone for the cat's eye. I used Pumpkin Pie Classic ink to stamp the sentiment from the stamp set included in the kit onto one of the labels. I cut one of the black lattice pieces in half and attached them to the back of the sentiment label on either side (to extend the length) and attached the sentiment to the wall with Stampin' Dimensionals. Using Memento Tuxedo Black ink, I stamped the jack-o-lantern faces onto the pumpkin die cuts from the kit and added them to the card front with Stampin' Dimensionals. I just love the die cuts in this kit make it so simple to decorate this card. It was so much fun designing this alternative card design and I can't wait to see what else I can create with this kit. 
Thank you for taking the time to visit my blog today. I hope that my card design helps inspire you to create your own wonderful alternative projects with this fun Fall Paper Pumpkin kit. There are so many wonderful possibilities to explore. 

Now it's time to visit Darla's blog and see what amazing alternative projects she has to share with us this month. Just click on the Next button below to visit her blog. I hope you will leave us a comment and let us know what you enjoyed about our projects for this kit. Enjoy the rest of our blog hop. 


If you live in the U.S. and do not already have a Stampin' Up! Demonstrator, please contact me and I would be happy to help you with your creative projects. Remember to sign up for the October Joy To The World Paper Pumpkin kit to get a jump start on your Christmas cards. Click here to subscribe. 

Until Next Time
Happy Stamping,
Tricia Butts
Independent Stampin' Up! Demonstrator
Like What You See? Visit My Online Store Here
Visit My Facebook Business Page for Updates & Ideas
Click here to Contact Me

Get An Early Start On Your Christmas Cards
With The October Paper Pumpkin Kit
Click Below To Subscribe by October 10th 

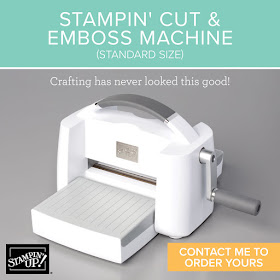
The New Stampin' Cut & Emboss Machine
Is Now Available
Click Below To Order


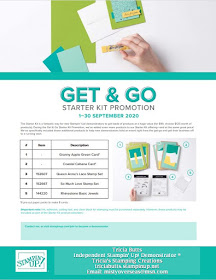
Last Days To Sign Up
Take Advantage Of The Amazing Benefits
Available When You Order Your Starter Kit
By September 30th
Click Below For More Details


Saturday, September 26, 2020

3D Paper Trimmer September Blog Hop August-December 2020 Mini Catalog

It's time to hop along with the 3D Paper Trimmer September Blog as we showcase products from the new August-December 2020 Mini Catalog. You will be visiting with talented Stampin' Up! Demonstrators from around the world as they share their ideas and projects to inspire you. 
Today I am sharing a cute treat box created with the Ghoulish Goodies stamp set paired with the Magic In This Night Designer Series Paper from the August-December 2020 Mini Catalog. I decorated one of the Acetate Card Boxes (item #144628) from the 2020-2021 Annual Catalog as a fun Trick or Treat idea for Halloween. 
Supplies Used:
Ghoulish Goodies stamp set (item #153362)
Magic In This Night Designer Series Paper (item #153517)
1 1/2" Metallic Mesh Ribbon (item #153550)
Acetate Card Box (item #144628 - set of 10)
Layering Circles Dies (item #151770)
Rich Razzleberry cardstock (item #115316)
Basic Black cardstock (item #121045)
Memento Tuxedo Black Ink Pad (item #132708)
Granny Apple Green Classic Ink Pad (item #147095)
Measurements:
Magic In This Night Designer Series Paper - 12" x 2"
Whisper White cardstock - for circle die cut for stamped image
Basic Black cardstock - for circle die cut layer
Rich Razzleberry cardstock - for scalloped circle die cut
This treat box is simple to decorate as the acetate card box is already assembled ready to go. I wrapped the strip of designer series paper around the center of the box and attached the ends together with adhesive. I then wrapped a piece of the Metallic Mesh Ribbon around the designer series paper layer and tied a bow on the left side of the front of the box. Using the stamp images from the Ghoulish Goodies stamp set, I decorated the Whisper White circle die cut and then layered it onto the Basic Black cardstock circle. I attached these circles to the Rich Razzleberry scalloped circle die cut with Black Stampin' Dimensionals to pop it up. I then attached the focal image to the designer series paper with Black Stampin' Dimensionals next to the bow. To make it easier to photograph, I added a piece of green tissue paper inside the box for a pop of color. You can fill this treat box with candy or with a small gift. There are so many wonderful possibilities for this easy to assemble treat box.
Thank you for taking the time to visit my blog today. I hope that my project inspires you to explore the wonderful new products in the new mini catalog. There are so many possibilities to help you create projects for the upcoming holiday season. 

Now it's time to visit Simone's blog and see what she has to share from the new Mini Catalog. Just click the Next button below to visit her blog. We would love it if you would leave us a comment and let us know what you enjoyed about our projects. I hope you enjoy the rest of our blog hop. 

If you live in the U.S. and do not already have a Stampin' Up! Demonstrator, please contact me and I would be happy to help you with your creative projects. You may also visit my Online Store to place an order and have it shipped to you. 
Until Next Time
Happy Stamping,
Tricia Butts
Independent Stampin' Up! Demonstrator
Like What You See? Visit My Online Store Here
Visit My Facebook Business Page for Updates & Ideas
Click here to Contact Me

The August-December 2020 Mini Catalog
Is Now Available
Click Below To Visit My Online Store


The Stampin' Cut & Emboss Machine
Is Now Available
Click Below To Order


Join My Team
Enjoy The Wonderful Benefits
As A Stampin' Up! Demonstrator
Click Below For More Details

Ink. Stamp. Share. September Monthly Blog Hop Colour Challenge

Welcome to the Ink. Stamp. Share. September Monthly Blog Hop and this month we have a color challenge to inspire us. You will be visiting with talented Stampin' Up! Demonstrators from around the world as they share their amazing projects and ideas. 

Our color challenge this month is to create a project using at least three of the challenge colors: Pretty Peacock, Just Jade, Gorgeous Grape, Merry Merlot and Melon Mambo. 
I love how bright and cheerful this color combination is, so I decided to create a celebration card using the Pattern Play stamp set from the 2020-2021 Annual Catalog. I was able to combine all 5 of the colors into this fun design and this card could work for a birthday or to celebrate a special event in someone's life. The circle die cut was created using one of the circle dies from the Stitched Shapes Dies that are also in the Annual Catalog. 
Supplies Used:
Pattern Play stamp set (item #152523)
Stitched Shapes Dies (item #152323)
Pretty Peacock cardstock (item #150880)
Just Jade cardstock (item #153079)
Whisper White cardstock (item #100730)
Melon Mambo Classic Ink Pad (item #147051)
Merry Merlot Classic Ink Pad (item #147112)
Gorgeous Grape Classic Ink Pad (item #147099)
White Embossing Powder (item #109132)
Basic Rhinestone Jewels (item #144220)
Measurements:
Pretty Peacock cardstock card base - 8 1/2" x 5 1/2" 
(scored at 4 1/4")
Just Jade cardstock layer - 5 1/4" x 4"
Whisper White cardstock layer - 5" x 3 3/4"
Just Jade cardstock for circle die cut
The images in this stamp set are great for creating a fun background and I combined Merry Merlot, Melon Mambo and Gorgeous Grape Classic inks to create the design. The sentiment was heat embossed with White Embossing Powder to step up the design and I added some Basic Rhinestones for a touch of bling. 
Thank you for taking the time to visit my blog today. I hope that you have enjoyed my card design and I hope it will provide you with new ideas to help you use these colors in your own projects. 

Now it's time to visit Sue's blog and see what she has created for us this month. Just click the Next button below to visit her blog or use the Roll Call List below to find your way. I hope that you enjoy our blog hop.  


If you live in the U.S. and do not already have a Stampin' Up! Demonstrator, please contact me and I would be happy to help you with your creative projects. You may also visit my Online Store to place your order and have it shipped to your home. 

Until Next Time
Happy Stamping,
Tricia Butts
Independent Stampin' Up! Demonstrator
Like What You See? Visit My Online Store Here
Visit My Facebook Business Page for Updates & Ideas
Click here to Contact Me

The New Stampin' Cut & Emboss Machine
Is Now Available
Click Below To Order


Join My Team
Enjoy The Wonderful Benefits
As A Stampin' Up! Demonstrator
Click Below For More Details


The August-December 2020 Mini Catalog
Is Now Available
Click Below To Visit My Online Store


Friday, September 18, 2020

SBTD September Blog Hop Leaves & Trees

Welcome to the SBTD September Blog Hop as we showcase projects with the theme of leaves and trees. You will be visiting with wonderful Stampin' Up! Demonstrators as they share their ideas and projects to help inspire you. 
At this time of year, when I think of leaves and trees, I am reminded of the beauty of Fall. So I decided to create a clean and simple Fall card using the Beautiful Autumn Bundle (item #155189) combined with the coordinating Gilded Autumn Specialty Designer Series Paper (item #153520) from the August-December 2020 Mini Catalog. I love the warm Copper and Gold Foil images on the designer series paper that I used as my background for this card design. For the sentiment, I used one of the dies from the Stitched So Sweetly Dies. 
Products Used:
Beautiful Autumn Bundle (item #155189)
Gilded Autumn Specialty Designer Series Paper (item #153520)
Wrapped In Texture Embossing Folders (item #153574)
Banners Pick A Punch (item #153608)
Early Espresso cardstock (item #119686)
Very Vanilla cardstock (item #101650)
3/16" Braided Linen Trim (item #147808)
Early Espresso Classic ink pad (item #147114)
Mint Macaron Classic ink pad (item #147106)
Cajun Craze Classic ink pad (item #147085)
Copper Foil Sheets (item #142020)
Clear Wink Of Stella Glitter Brush (item #141897)
Gold Embossing Powder (item #109129)
Measurements:
Early Espresso cardstock card base - 8 1/2" x 5 1/2" 
(scored at 4 1/4")
Gilded Autumn Specialty Designer Series Paper layer - 5 1/4" x 4"
Early Espresso strip - 1 1/2" x 4 1/4" 
(embossed with the small trio dots embossing folder from the Wrapped In Texture Embossing Folders)
Copper Foil strip - 1/2" x 4 1/4" 
(ends flagged using the Banners Pick A Punch)
Very Vanilla cardstock for sentiment label and stamped images
This card design is very simple to assemble with minimal stamping. The leaves and acorn images from the Beautiful Autumn stamp set, were stamped onto Very Vanilla cardstock using Mint Macaron, Cajun Craze and Early Espresso Classic ink pads and punched out using the coordinating punches from the Autumn Punch Pack (you can save 10% when you order these products as a bundle). The sentiment was heat embossed with Gold Embossing Powder to coordinate with the background design and die cut with the Stitched So Sweetly Dies. The small bow was tied with the 3/16" Braided Linen Trim to add a little texture to the design. For a touch of shimmer, I added Clear Wink of Stella to the stamped leaves and acorn images. I love the classic elegance of this card design and I think it would be perfect for Thanksgiving or just a special card to let someone know how much you appreciate them in your life. 
Thank you for taking the time to visit my blog today. I hope that my card design helps inspire you to explore this wonderful theme to create your own beautiful projects, no matter what the season. There are so many options to explore in the August-December 2020 Mini Catalog. 

Now it's time to visit Diane's Blog and see what she has to share with us this month. Just click on the Next button below to visit her blog. We would love it if you would leave us a comment and let us know what you enjoyed about our projects. I hope you enjoy our blog hop. 

Diane

If you live in the U.S. and do not already have a Stampin' Up! Demonstrator, please contact me and I would be happy to help you with your creative projects. You may also visit my Online Store to place your order and have it shipped to you. 

Until Next Time
Happy Stamping,
Tricia Butts
Independent Stampin' Up! Demonstrator
Like What You See? Visit My Online Store Here
Visit My Facebook Business Page for Updates & Ideas
Click here to Contact Me

The New Stampin' Cut & Emboss Machine
Is Now Available
Click Here To Order
Click Here To Order


Join My Team
Enjoy The Wonderful Benefits
As A Stampin' Up! Demonstrator
Click Below For Details
Click Here For Details


The August-December 2020 Mini Catalog
Is Now Available
Click Below To Visit My Online Store

Click Here To Visit My Online Store


Monday, September 14, 2020

Kylie Bertucci's Demonstrator Training Monthly Blog Hop September 2020


Welcome to Kylie Bertucci's Demonstrator Training Program Monthly Blog Hop for September 2020. This is my last time hopping with this wonderful group of talented Stampin' Up! Demonstrators as our year comes to an end for this amazing training program. I have learned so much from Kylie and Bruno as well as the many talented people who have shared their knowledge and creativity over the past year. I hope that you will enjoy the projects we have to share during our blog hop.
 Today I decided to share a card design that uses the Gnome For The Holidays stamp set (item #153322) and give it a Halloween twist. I paired it with the beautiful Magic In This Night Designer Series Paper (item #153517) and 1 1/2" Metallic Mesh Ribbon (item #153550) and had my gnome friend dress up as a wizard for trick or treating. To coordinate with the spiders in the background, I added the spider web die cut from Basic Black Glitter Paper (item #153518) using the Peek A Hoot Dies (item #153573) for a touch of sparkle. These amazing products can be found in the August-December 2020 Mini Catalog and I love how you can mix and match them to create fun designs for a variety of occasions. 
 Products Used:
Gnome For The Holidays stamp set (item #153322)
Little Treats stamp set (item #153376)
Magic In This Night Designer Series Paper (item #153517)
Peek A Hoot Dies (item #153573)
Layering Ovals Dies (item #151771)
Basic Black Glitter Paper (item #153518)
1 1/2" Metallic Mesh Ribbon (item #153550)
Iridescent Pearls (item #153549)
Stampin' Blends Markers
 Measurements:
Pretty Peacock cardstock card base - 8 1/2" x 5 1/2" 
(scored at 4 1/4")
Magic In This Night DSP layer - 5 1/4" x 4"
Pretty Peacock cardstock for scalloped oval die cuts
Whisper White cardstock for gnome stamped image 
and oval die cut
Metallic Mesh Ribbon approx 5 1/2"
The gnome image was stamped with Memento Tuxedo Black ink and colored with Stampin' Blends Markers. I chose colors that would give the gnome the appearance of being a wizard using Rich Razzleberry, Pumpkin Pie, Daffodil Delight and Smoky Slate and added Clear Wink of Stella to add a touch of shimmer. I sponged the background oval using Sponge Daubers and a combination of Balmy Blue, Daffodil Delight and Night of Navy Classic inks to create a eerie night sky. I added the die cut spider web to the top of the layered ovals with adhesive and used Mini Stampin' Dimensionals to add the gnome to the oval so that it overlaps the spider web. The sentiment was heat embossed with White embossing powder onto Basic Black cardstock and die cut with the Layering Ovals Dies. I love how the Metallic Mesh Ribbon adds texture to the card design without being bulky. This was so much fun taking what would normally be considered a Christmas stamp set and using it for an alternative holiday. I can't wait to see what other alternative occasions I can use this stamp set for.

Thank you for taking the time to visit my blog today. I hope that you have enjoyed my card design and I hope that it inspires you to get creative and explore new opportunities with your own projects. 

Please take the time to visit the many wonderful Demonstrators who are participating today in our blog hop. Just click on the links in the list below to visit them. We would love it if you would leave us a comment and let us know what you enjoyed about our projects. 

A big thank you to Kylie and Bruno Bertucci for sharing this wonderful opportunity. I have enjoyed this training program and learned so much from them both. 

If you live in the U.S. and do not already have a Stampin' Up! Demonstrator, please contact me and I would be happy to help you with your creative projects. You may also visit my Online Store to place your order and have it shipped to you.
Until Next Time
Happy Stamping,
Tricia Butts
Independent Stampin' Up! Demonstrator
Like What You See? Visit My Online Store Here
Visit My Facebook Business Page for Updates & Ideas
Click here to Contact Me

The New Stampin' Cut & Emboss Machine
Is Now Available
Click Below To Order
 Click Here To Order


Join My Team
Enjoy The Wonderful Benefits
As A Stampin' Up! Demonstrator
Click Below For More Details
 Click Here For Details


The August-December 2020 Mini Catalog
Is Now Available
Click Below To Visit My Online Store
 Click Here To Visit My Online Store