Saturday, August 29, 2020

Ink. Stamp. Share. August Blog Hop August-December 2020 Mini Catalog

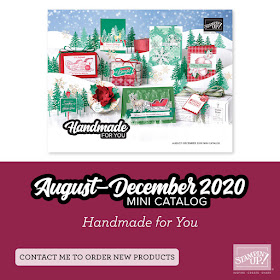
It's time to hop along with the Ink. Stamp. Share. August Blog Hop as we showcase products from the new August-December 2020 Mini Catalog. You will be visiting with talented Stampin' Up! Demonstrators from around the world as they share their projects and ideas to help inspire you for the holidays. 
 Today I thought I would share a clean and simple card design featuring the Gather Together Bundle (item #153036) from the new August-December 2020 Mini Catalog. You may remember this returning favorite from last year's Holiday Catalog and I am so happy that it has made a comeback. I combined it with several products from the 2020-2021 Annual Catalog to create a design that would be perfect as a masculine Fall card. I love the soft texture of the background created with the Subtle 3D Embossing Folder (item #151775) and the Lovely Labels Pick A Punch is great for creating custom sized sentiment labels to suit longer sentiments. The color combination I chose was Mint Macaron, Cajun Craze and Very Vanilla and I used Gold Embossing Powder to heat emboss the leaf image and sentiment. The beautiful ribbon is from the new Basket Weave & Metallic Ribbon Combo Pack (item #153553) in the new Mini Catalog as is part of the wonderful Gilded Autumn Suite. 
 Products Used:
Gather Together Bundle (Mini Catalog) item #153036
Subtle 3D Embossing Folder (Annual Catalog) item #151775
Lovely Labels Pick A Punch (Annual Catalog) item #152883
Basket Weave & Metallic Ribbon Combo Pack (Mini Catalog) item #153553
Gold Embossing Powder
Measurements:
Mint Macaron cardstock card base - 8 1/2" x 5 1/2" (scored at 4 1/4")
Cajun Craze cardstock layer - 5 1/4" x 4"
Very Vanilla cardstock layer - 5" x 3 3/4" (embossed with Subtle 3D Embossing Folder)
Cajun Craze cardstock strip - 3/4" x 3 1/4"
Mint Macaron Basket Weave Ribbon - approx 4 1/2"
 The leaf image from the Gather Together stamp set was stamped onto the Cajun Craze layer of cardstock (towards the top center) and heat embossed with Gold Embossing Powder. I die cut the leaf image with the coordinating die from the Gathered Leaves Dies. I also die cut an opening in the top center of the Very Vanilla embossed cardstock layer using the same die. When assembling the card design, I attached the Cajun Craze cardstock layer to the Mint Macaron card base with adhesive. I added Stampin' Dimensionals to the back of the Very Vanilla cardstock layer and attached the Mint Macaron Ribbon to the bottom of the layer approx. 3/4" from the bottom. I attached the Very Vanilla cardstock layer on top of the Cajun Craze layer and then added the die cut embossed leaf inside the opening with adhesive, pressing down firmly to attach it to the Cajun Craze cardstock layer. The sentiment layer was added to the ribbon with Stampin' Dimensionals to complete the design. The Gold Embossing adds a touch of elegance to the card that doesn't over power this simple design.
Thank you for taking the time to visit my blog today. I hope that my card design helps inspire you to create your own holiday projects for the upcoming seasons with the amazing new products in the August-December 2020 Mini Catalog. There are so many wonderful options to choose from. 

Now it's time to visit Cindy's wonderful blog and see what she has to share with us from the new Mini Catalog. Just click on the Next button below to visit her blog or use the Roll Call List below to find your way. We would love it if you would leave us a comment and let us know what you enjoyed about our projects. I hope you enjoy the rest of our blog hop. 
 Cindy

Roll Call

If you live in the U.S. and do not already have a Stampin' Up! Demonstrator, please contact me and I would be happy to help you with your creative projects. You may also visit my Online Store to place your order and have it shipped to you. 

Until Next Time
Happy Stamping,
Tricia Butts
Independent Stampin' Up! Demonstrator
Like What You See? Visit My Online Store Here
Visit My Facebook Business Page for Updates & Ideas
Click here to Contact Me


The August-December 2020 Mini Catalog Is Here!
Click Below To Visit My Online Store
 Click Here To Visit My Online Store


Tuesday, August 25, 2020

PPP August Blog Hop World's Greatest

Welcome to the PPP August Blog Hop as we showcase alternative project ideas using the World's Greatest Kit. You will be visiting with talented Stampin' Up! Demonstrators as they share their wonderful ideas and projects to help inspire you to think outside the box. 
 My alternative card design this month is dedicated to my youngest son. He starts back at school on Thursday and instead of riding the bus to school to meet up with his friends and new teachers, he will be sitting at home in front of his computer for remote learning. It is one of the tough things about this pandemic but as a new high school sophomore, he understands the importance of keeping everyone safe and he is just hopeful that he will one day be able to attend school the old fashioned way.  So to celebrate his first day back at school, I designed this card using supplies from the World's Greatest August Paper Pumpkin Kit and combined it with a few simple supplies that from the 2020-2021 Annual Catalog. I love the colors in this kit and the pattern of the card base from the kit made a wonderful background layer for my card design.  
 Supplies Include:
Paper Pumpkin August 2020 World's Greatest Kit
Layering Circles Dies (item #151770)
Bumblebee Classic Ink Pad (item #153116)
Bumblebee 1/4" Ribbon (item #153622)
Stitched Nested Labels Dies (item #149638)
Label Me Fancy Punch (item #151297)
Measurements
Pacific Point cardstock card base - 8 1/2" x5 1/2" (scored at 4 1/4")
Background layer - 5 1/4" x 4" piece cut from Mint Macaron card base from kit

The foil scalloped circle and Whisper White circle layer for the medal are from the kit and were stamped using the Pacific Point Ink Spot with the sentiment from the stamp set, also from the kit. The rosette stamp image was stamped with Bumblebee Classic  Ink onto a scrap of Whisper White cardstock and die cut with one of the scalloped circle dies from the Layering Circles Dies. The ribbon image was also stamped with Pacific Point ink onto a scrap of Whisper White cardstock and I fussy cut it out. The label base was punched from a scrap of Pacific Point cardstock using the Label Me Fancy Punch and the circle sentiment and scalloped circle layer were die cut using the Layering Circles Dies. The small sentiment label was die cut using the Stitched Nested Labels Dies and decorated with gold stars from the kit. The bow was tied with a piece of Bumblebee 1/4" Ribbon and attached with a Mini Glue Dot. 
Thank you for taking the time to visit my blog. I hope that my card design inspires you to take a second look at this wonderful Paper Pumpkin kit and come up with your own alternative designs. There are so many great possibilities to explore with this kit to show the people in our lives how much we appreciate them. 

Now it's time to visit Dana's wonderful blog and see her amazing alternative ideas. Just click the Next button below to visit her blog. We would love it if you would leave us a comment and let us know what you liked about our projects. I hope you enjoy the rest of our blog hop. 
 Dana

If you live in the U.S. and do not already have a Stampin' Up! Demonstrator, please contact me and I would be happy to help you with your creative projects. Now is a great time to sign up for Paper Pumpkin and receive the wonderful September Kit to create 20 cracker box treat packages that you can decorate for Fall, Halloween or Thanksgiving. To subscribe, click the image below to sign up by September 10th. 

Until Next Time
Happy Stamping,
Tricia Butts
Independent Stampin' Up! Demonstrator
Like What You See? Visit My Online Store Here
Visit My Facebook Business Page for Updates & Ideas
Click here to Contact Me

Get a start on your Fall Projects
With The September Paper Pumpkin Kit
Click Below To Subscribe By September 10th
 Click Here To Subscribe

The August-December 2020 Mini Catalog Is Here!
Have Fun Creating Your Projects For The Holidays
Click Below To Visit My Online Store
 Click Here To Visit My Online Store


Saturday, August 22, 2020

3D Paper Trimmer August Blog Hop Vacation

Today we are hopping along with the 3D Paper Trimmer August Blog Hop and this month our theme is vacation. You will be visiting with talented Stampin' Up! Demonstrators from around the world as they share their ideas and projects to help inspire you. 
 One of our favorite places to go on vacation is the Rocky Mountains. Living in Colorado, we are so lucky that we can be there in an hour and enjoy the beautiful scenery, fresh air and enjoy the great outdoors. This year we have not been able to visit our favorite spots due to the pandemic and just recently the terrible wildfires that are burning in several areas of our wonderful mountains. So I thought I would share this fun fold card design as a reminder that one day we will be able to return and again enjoy these majestic mountains. 
 Products Used: (can be located in the 2020-2021 Annual Catalog)
Mountain Air Bundle (item #153820) Save 10%
includes the Mountain Air stamp set (item #151610) and 
coordinating Majestic Mountains Dies (item #151608)
Stitched So Sweetly Dies (item #151690)
Beautiful Moments stamp set (item #151677)
2019-2021 In Color 6"x6" Designer Series Paper - Pretty Peacock
Braided Linen Trim (item #147808)
Measurements:
Night of Navy cardstock card base - 8 1/2" x 5 1/2"
- Score at 2 1/8" and 4 1/4"
Pretty Peacock Woodgrain Designer Series Paper
- 1 7/8" x 5 1/4" and 2 1/8" x 5 1/4"
Very Vanilla cardstock layer (inside)
- 5 1/4" x 4"
This simple Z Fold is easy to assemble and fun to create. The focal layer was created using the Stitched So Sweetly Dies and I stamped the images from the Mountain Air stamp set using Night of Navy, Sahara Sand and Pretty Peacock Classic ink pads. The sky was sponged using Sponge Daubers and Petal Pink, Flirty Flamingo and Calypso Coral Classic ink pads. I added the grass to the bottom of the design using a Blender Pen and Pear Pizzazz Classic ink pad. The sentiment is from the Beautiful Moments stamp set and was heat embossed using Gold Embossing Powder onto a label die cut from Very Vanilla cardstock using a die from the Stitched So Sweetly Dies. The detailed tree image was die cut from Night of Navy cardstock using a die from the Majestic Mountains dies and attached to the left side of the focal image with adhesive. This card would be great for a masculine card and works for a variety of occasions. 
Thank you for taking the time to visit my blog today. I hope that my card design inspires you to explore creating your own beautiful projects with this fun theme. There are so many wonderful products available from Stampin' Up! to help you unlock your creativity. 

Now it's time to visit Jo's wonderful blog and see what she has created for us this month. Just click the Next button below to visit her blog. We would love it if you would leave us a comment and let us know what you enjoyed about our projects. I hope you enjoy the rest of our blog hop. 
 Jo


If you live in the U.S. and do not already have a Stampin' Up! Demonstrator, please contact me and I would be happy to help you with your creative projects. You may also visit my Online Store to place your order and have it shipped directly to you. 
Until Next Time
Happy Stamping,
Tricia Butts
Independent Stampin' Up! Demonstrator
Like What You See? Visit My Online Store Here
Visit My Facebook Business Page for Updates & Ideas
Click here to Contact Me


The New August-December 2020 Mini Catalog Is Now Available
Click Below To Visit My Online Store
 Click Here To Visit My Store


Friday, August 21, 2020

SBTD 3rd Anniversary Blog Hop Stampers Choice

Welcome to the SBTD August Blog Hop as we celebrate our 3rd Anniversary with a Stamper's Choice theme. You will be visiting with talented Stampin' Up! Demonstrators as they share wonderful projects and ideas to help inspire you. 
 With Fall just a few weeks away, I thought I would share a clean and simple card design using the new Beautiful Autumn Bundle (item #155189) from the new August-December 2020 Mini Catalog. I was inspired by a card design created by fellow Stampin' Up! Demonstrator, Mary Fish, and I decided to warm up the design with some pretty Fall colors. I used a variety of Stampin' Blends Markers to color the images and I used Early Espresso Classic ink pad to stamp the images to coordinate with the rest of the card design. The sentiment was heat embossed with Gold Embossing Powder to add a touch of elegance to the design. 
 The products I chose to create this card design include:
Beautiful Autumn Bundle (item #155189) Save 10%
Includes the Beautiful Autumn stamp set (item #153450)and coordinating Autumn Punch Pack (item #153609)
Subtle 3D Embossing Folder (item #151775)
 Stitched Shapes Dies (item #152323)
Cinnamon Cider 1/4" Ribbon (item #152482)
Measurements
Sahara Sand cardstock card base - 8 1/2" x 5 1/2" (Scored at 4 1/4")
Very Vanilla cardstock layer - 5 1/4" x 4" (embossed with the Subtle 3D Embossing Folder)
Soft Suede layer - 4 3/8" x 2"
3 Very Vanilla Squares die cut using the smallest square die from the Stitched Shapes Dies
approx. 6" piece of Cinnamon Cider 1/4" Ribbon
Thank you for taking the time to visit my blog. I hope that my card design will help inspire you to create your own beautiful Fall projects with the wonderful products in the new August-December 2020 Mini Catalog. There are so many wonderful possibilities to explore. 

Now it's time to visit Judi's blog and see what she has to share with us to celebrate our 3rd Anniversary. Just click on the Next button below to visit her blog. I hope you enjoy the rest of our blog hop. 
 Judi

If you live in the U.S. and do not already have a Stampin' Up! Demonstrator, please contact me and I would be happy to help you with your creative projects. You may also visit my Online Store to place your order and have it shipped directly to you. 

Until Next Time
Happy Stamping,
Tricia Butts
Independent Stampin' Up! Demonstrator
Like What You See? Visit My Online Store Here
Visit My Facebook Business Page for Updates & Ideas
Click here to Contact Me

The New August-December 2020 Mini Catalog Is Here!
Click Below To Visit My Online Store
 Click Here To Visit My Online Store


Saturday, August 15, 2020

Ink. Stamp. Share. August Special Blog Hop


 Welcome to the Ink. Stamp. Share August Special Blog Hop where we share projects that we are currently working on. You will be visiting with talented Stampin' Up! Demonstrators from around the world as they share their ideas and projects to inspire you.
 Today I am sharing two of the Christmas cards I created using the Wonder Of The Season Memories & More Card Pack (item #153538) and the coordinating Wonder Of The Season Memories & More Cards & Envelopes (item #153539) from the new August-December 2020 Mini Catalog. I love that these products help to create clean and simple Christmas cards that are easy to create and look amazing. 
 For the first card design, I chose one of the large 4"x6" card designs from the Wonder Of The Season Memories & More Card Pack and added it to the front of one card bases from the Wonder Of the Season Memories & More Cards & Envelopes using Stampin' Dimensionals to pop it up. I love the contrast of the Shaded Spruce design against the Whisper White card base. To embellish my Christmas card, I colored some Basic Pearls with the Dark Poppy Parade Stampin' Blends Marker and added them to the card front to accent the holly leaves of the design. I also tied a simple bow with the Silver Metallic Edge Ribbon and attached it to the lower right corner of the oval with a Mini Glue Dot. I love how these simple embellishments take this card design to the next level. 
 The second design also uses one of the card bases from the Wonder Of The Season Memories & More Cards & Envelopes but this time I used one of the smaller 3"x4" cards from the Wonder Of The Season Memories & More Card Pack to create the focal design. Once again, I used Stampin' Dimensionals to attach the card design and I centered it within the pretty Red Foil Frame design on the card base. I love the elegance that the Red Foil detail adds to the card design. 
To embellish this card design, I tied a simple bow with the Whisper White 1/4" Crinkled Seam Binding Ribbon (item #151326) and added it to the sign post with a Mini Glue Dot. For a touch of bling, I added several small Basic Rhinestones to the card front to complete this simple design. 
 The Wonder Of The Season Memories & More Card Pack is filled with wonderful possibilities with a wide variety of designs in both 3"x4" and 4"x6" card designs plus Gold Foil stickers to help you embellish your projects. In addition to creating Christmas cards, these designs are wonderful for recording memories of the holidays with Pocket Scrapbooking. 
Thank you for taking the time to visit my blog today. I hope that my card designs help inspire you to create your own projects using these products from the new August-December 2020 Mini Catalog. There are so many wonderful options to explore. 

Now it's time to visit Cindy's blog and see what she has to share with us.  Just click the Next button below to visit here blog. We would love it if you would leave us a comment and let us know what you enjoyed about our projects. I hope you enjoy the rest of our blog hop. 
 Cindy

August Special Roll Call

If you live in the U.S. and do not already have a Stampin' Up! Demonstrator, please contact me and I would be happy to help you with your creative projects. You may also visit my Online Store to place your order and have it shipped directly to you.
Until Next Time
Happy Stamping,
Tricia Butts
Independent Stampin' Up! Demonstrator
Like What You See? Visit My Online Store Here
Visit My Facebook Business Page for Updates & Ideas
Click here to Contact Me


Wednesday, August 12, 2020

New At SU August Blog Hop Mini Catalog Premier

It's time to hop along with the New At SU August Blog Hop as we showcase products in the New August-December 2020 Mini Catalog. You will be visiting with talented Stampin' Up! Demonstrators as they share their ideas and projects to help inspire you. 
I love Halloween so I thought I would share a fun card design created with the Flight of Fancy stamp set (item #153410), one of the hidden gems in this new catalog. I paired it with the amazing Magic In This Night Designer Series Paper (item #153517) to create a spooky background and added the Ghoulish Goodies stamp set (item #153362) for the sentiment. 
To create this Halloween card, I started with Pretty Peacock cardstock for the card base and I added a layer of the Magic In This Night Designer Series Paper for the background. I wanted my card design to be colorful while still reflecting a fun, spooky feeling. I added a piece of the new 1 1/2" Metallic Mesh Ribbon (item #153550) around the center of the background to add some texture to the design. 
The focal design was created by die cutting a piece of Whisper White cardstock with one of the scalloped rectangle dies from the Stitched So Sweetly Dies (item #151690), one of my favorite die sets in the 2020-2021 Annual Catalog. I stamped the witch image from the Flight of Fancy stamp set onto the die cut rectangle with Memento Tuxedo Black ink. I sponged the background using a variety of  Classic ink pad colors including Daffodil Delight, Mango Melody, Seaside Spray and Misty Moonlight, using Sponge Daubers to blend the colors together to create an eerie sky. 
I stamped the witch image a second time onto a piece of Whisper White cardstock and fussy cut around the moon, witch and broomstick. I colored the image using a variety of Stampin' Blends Marker including Light and Dark Rich Razzleberry, Light Soft Sea Foam, Light Cinnamon Cider, Light and Dark Cajun Craze and Light and Dark Daffodil Delight. I added the witch and moon images to the sponged layer with Stampin' Dimensionals to pop them up. I heat embossed the sentiment from the Ghoulish Goodies stamp set with Silver Embossing Powder to the top left corner. This fun Halloween card is a wonderful way to brighten someone's day and a great example of how you can mix and match products in the August-December 2020 Mini Catalog. 
Thank you for taking the time to visit my blog today. I hope that my card design will help inspire you to look at the hidden gems in this new catalog to help you with your holiday projects. You will be amazed and the variety of ways you can mix and match the products to create wonderful projects. 

Now it's time to visit Cynthia's wonderful blog and see what new product she is showcasing today. Just click on the Next button below to visit her blog or use the Roll Call List below to find your way. We would love it if you would leave us a comment and let us know what you enjoyed about our projects. We hope you enjoy our blog hop. 
Cynthia

August 2020 Blog Hop Roll Call 

If you live in the U.S. and do not already have a Stampin' Up! Demonstrator, please contact me and I would be happy to help you with your creative projects. You may also visit my Online Store to shop for your creative projects.
Until Next Time
Happy Stamping,
Tricia Butts
Independent Stampin' Up! Demonstrator
Like What You See? Visit My Online Store Here
Visit My Facebook Business Page for Updates & Ideas
Click here to Contact Me


The New August-December 2020 Mini Catalog Is Here!
Click Below To Visit My Online Store
 Click Here To Shop